Tony Trinh

Tony Trinh

Perspective Camera Match with Enscape
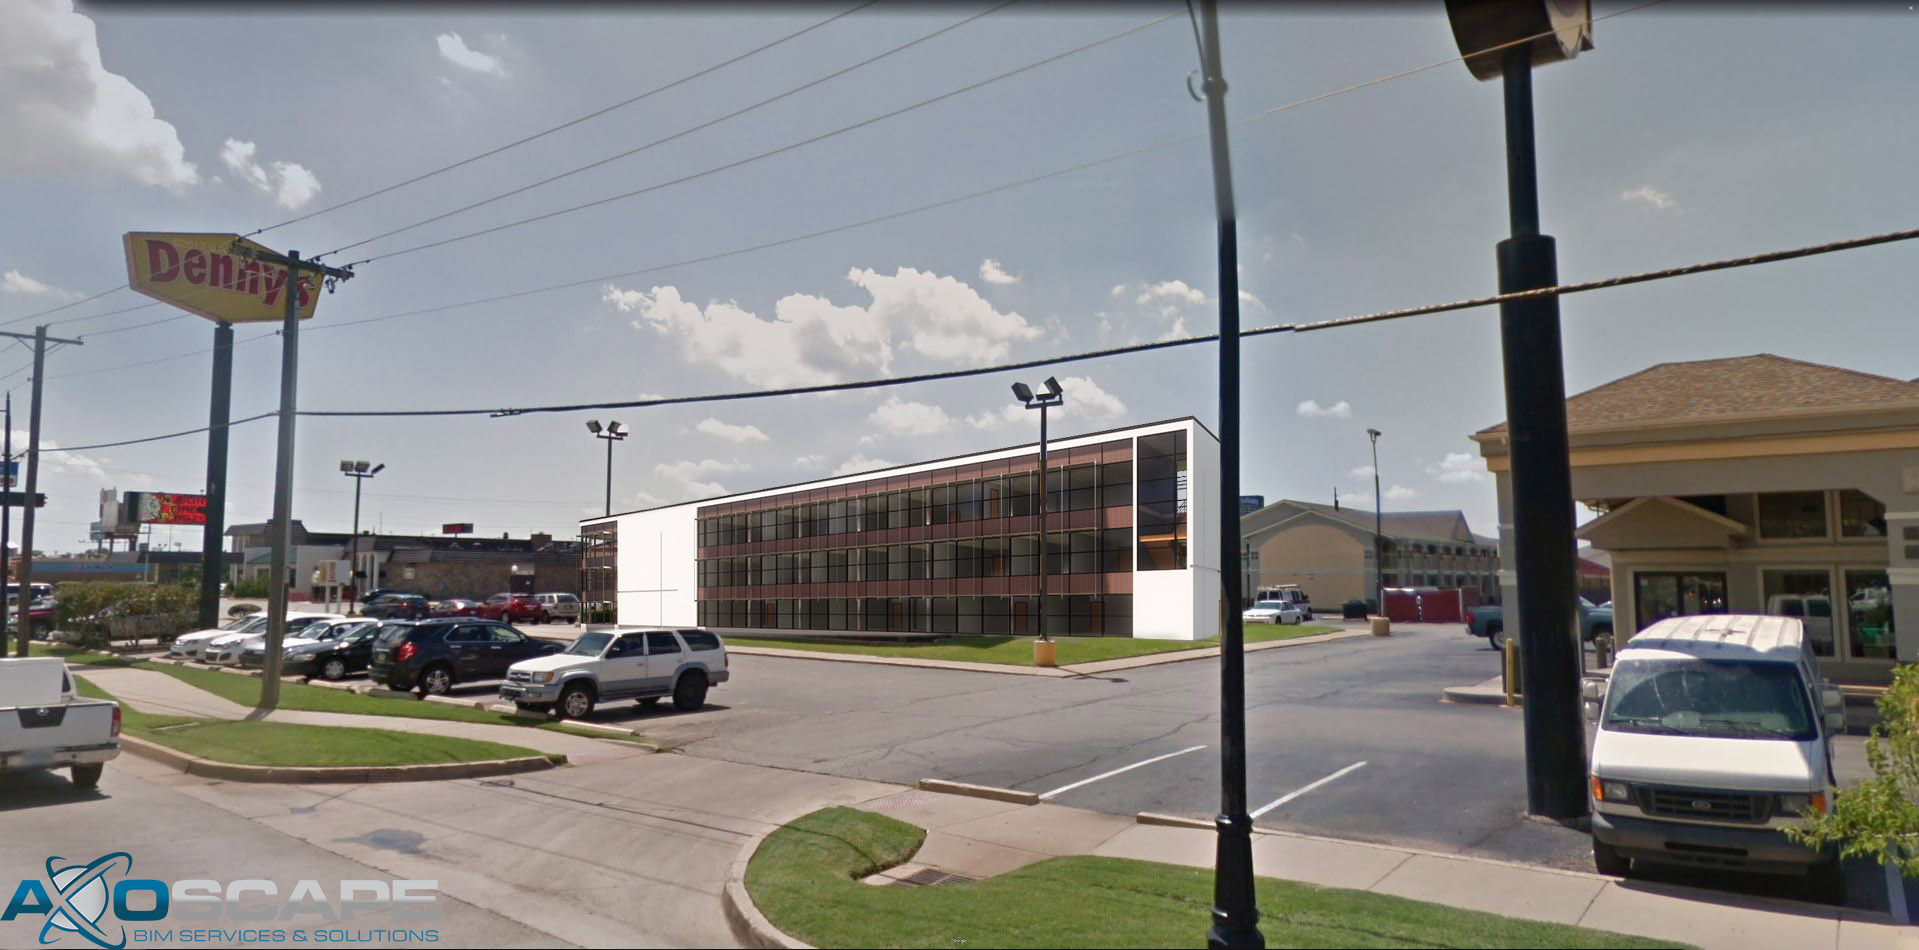
In this article, we’ll be going over how to camera match the perspective of an image using Enscape. This workflow should allow you to much more reliably camera match an Enscape building to an existing photo.

I want to note that I will not be diving too deep into Photoshop techniques in this article. The focus will be on how to match the perspective to Enscape’s camera and how to export images required for a superimposing workflow.

Before loading Enscape, I recommend creating a separate 3D view in Revit, hiding all elements and items that are not building related. The goal here to have the building completely isolated.


Here are the settings I used in order to completely remove any non-essential Enscape items from the scene.
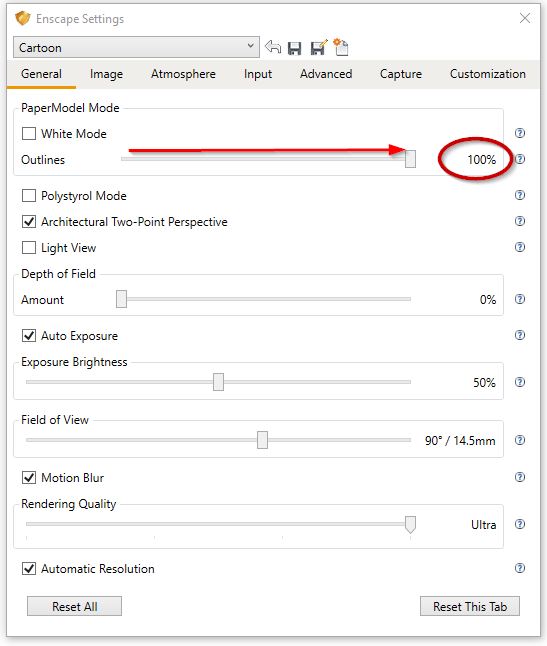
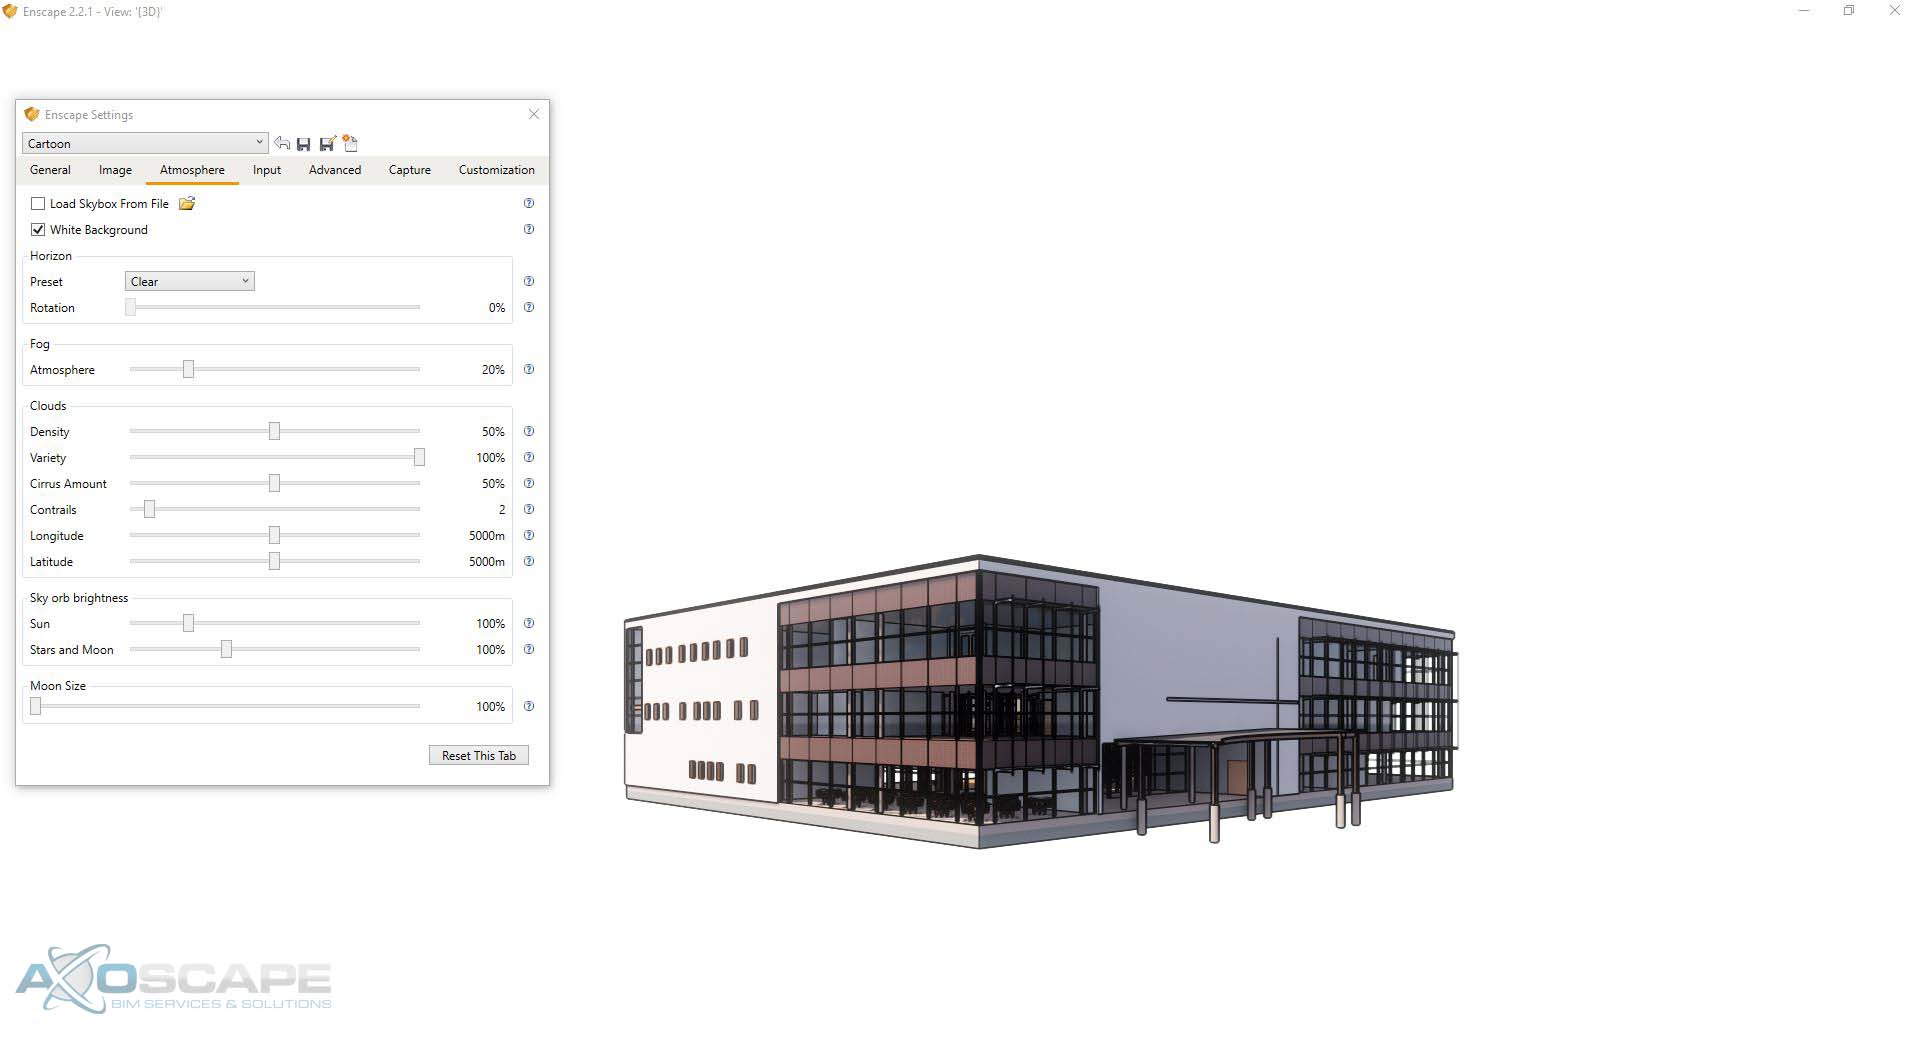
Also, it is extremely helpful for the purposes of perspective camera matching that outlines be at 100%. This will provide a clear outline of your building.
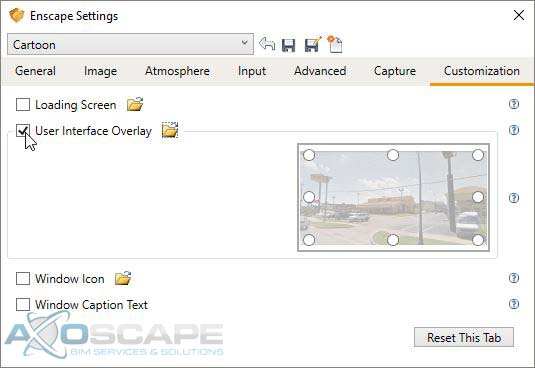

In order to begin camera matching.  We’ll be taking advantage of Enscape’s User Interface Overlay feature in the Customization tab in the settings. But before we can use any image as an overlay, the image will have to be modified in order for it to be semi-transparent.
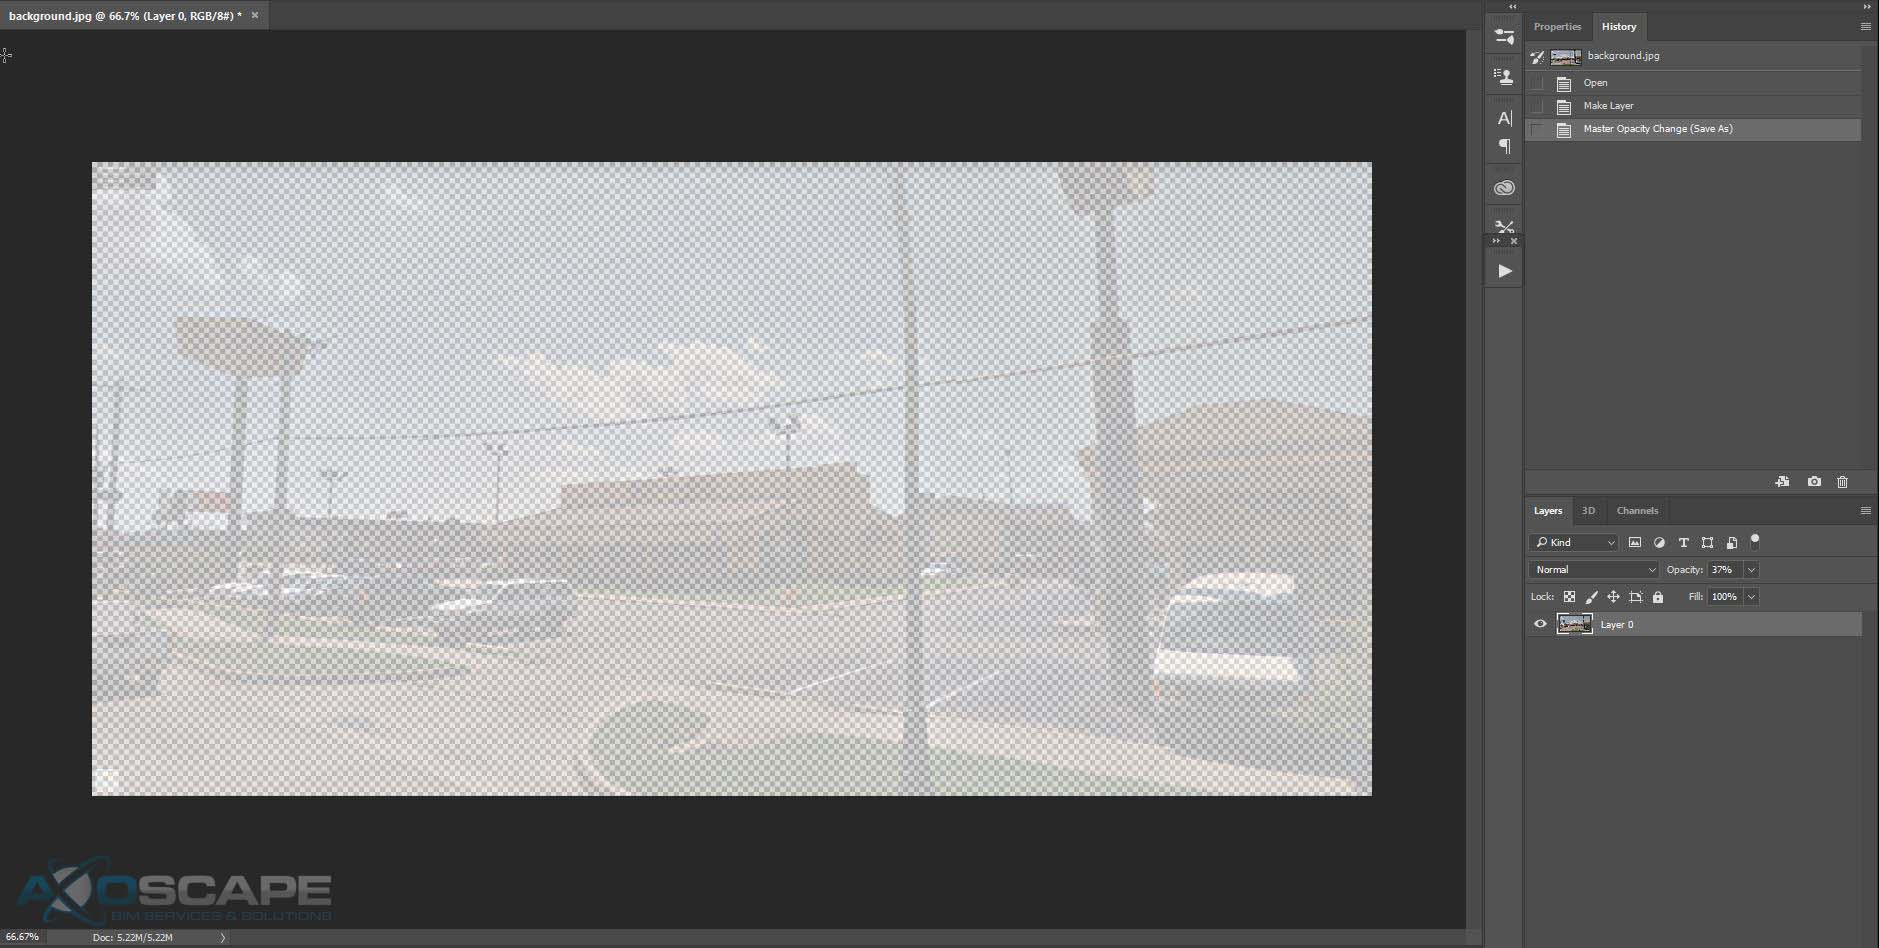
Load the background image into photoshop.

Unlock the layer by simply clicking on the lock icon in the background layer.

Once the layer has been unlocked, adjust the opacity slider to around 30%.
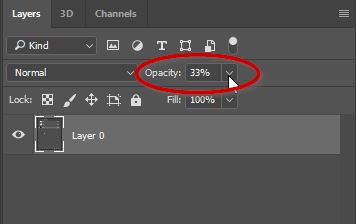
Your image should look like mine above. Where there is a checkerboard pattern brought through the image. The checkerboard won’t be apart of the image, it only serves as a visual representation of how transparent an image is.

Now all that’s left is to save the file…


IMPORTANT

The file must be saved as a PNG for this to work. Do not save this as a jpg or the transparency data will be lost.
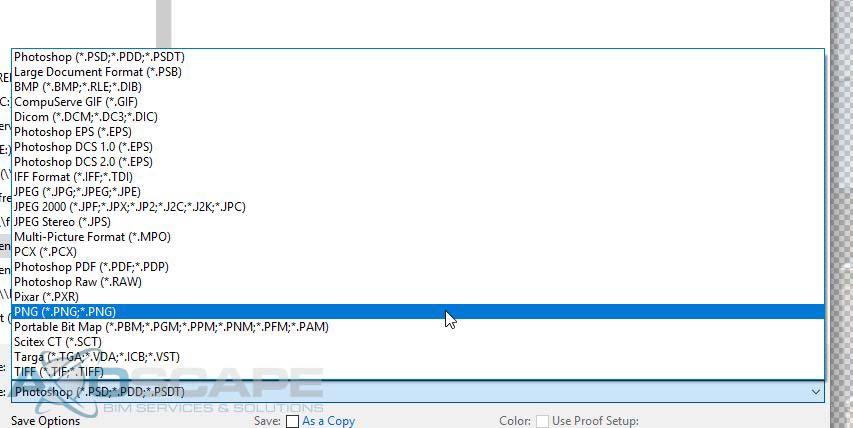
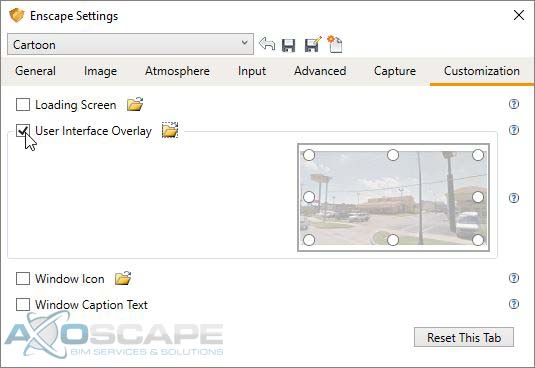
Now back in Enscape, return to the customization tab under “Enscape Settings” and click on the checkbox next to the “User Interface Overlay”. Now click on the folder icon and select the background PNG image we just created earlier.
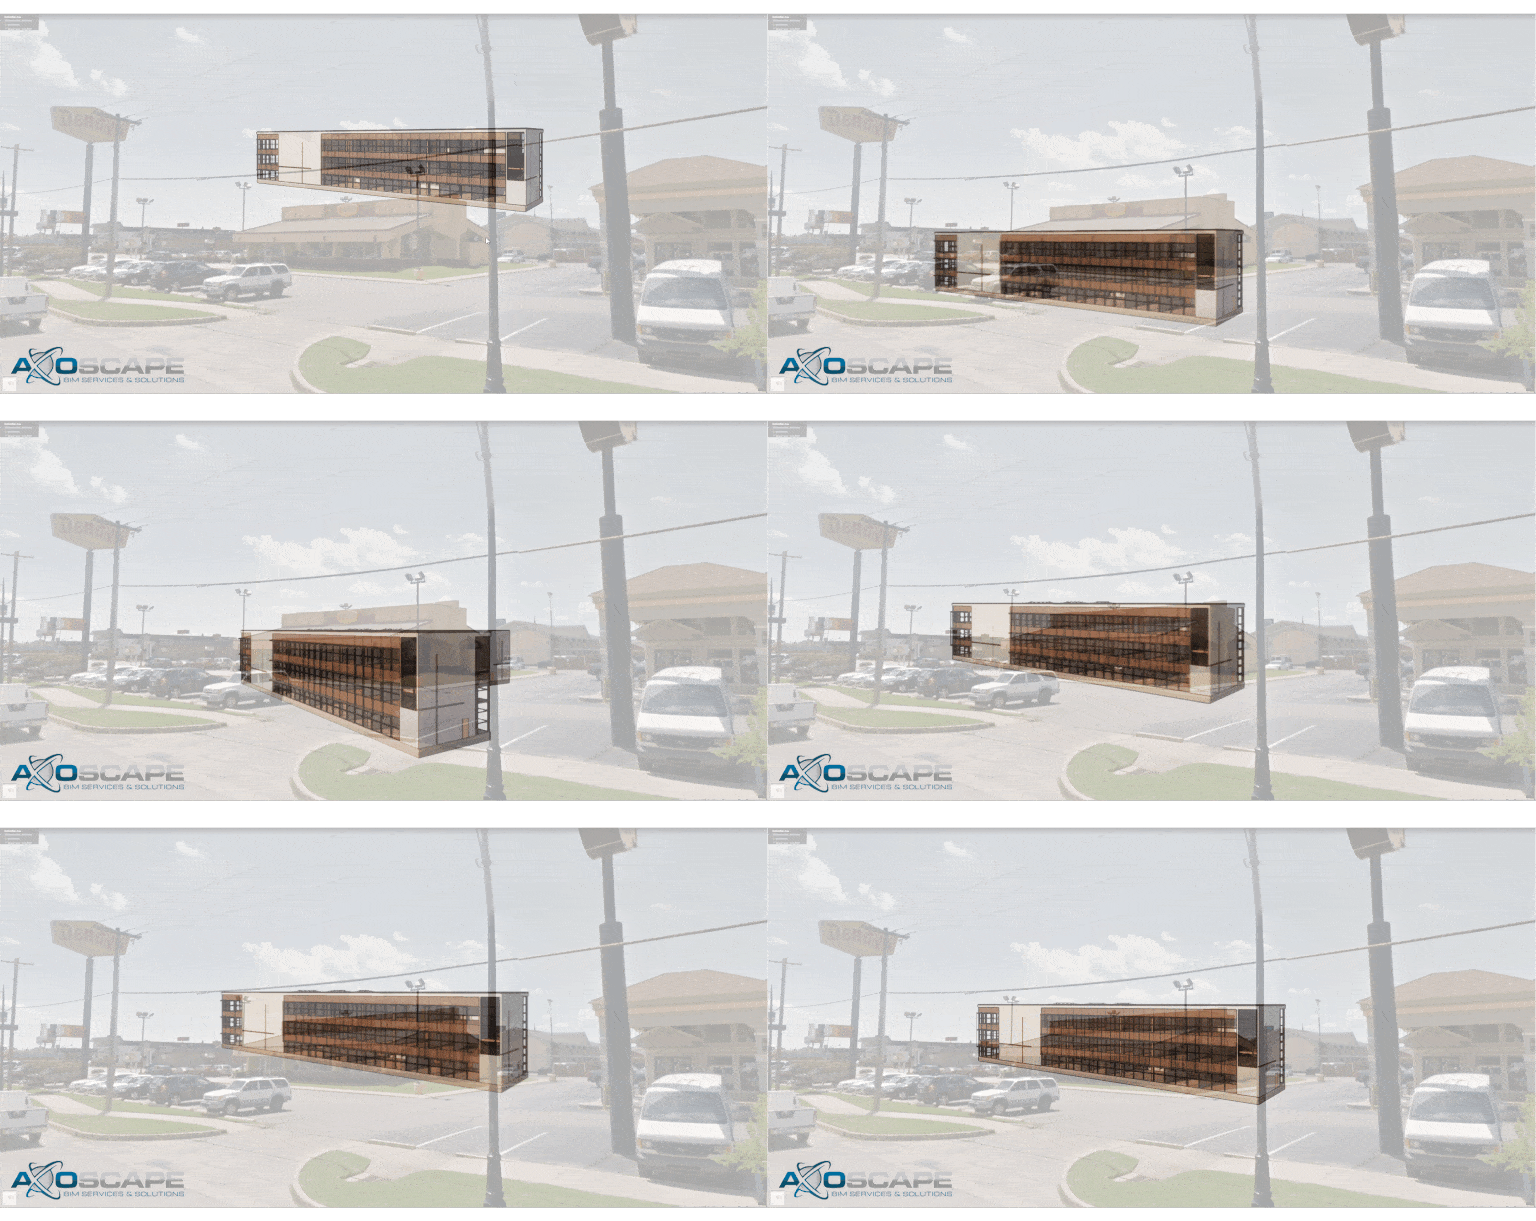
The Enscape viewport should look similar to the animated GIF above.  Where a fixed non-moving transparent image is overlayed the 3D Enscape scene.  Start navigating around the building until the building angle’s line up with the photograph. Once finished go back to “Enscape settings” and uncheck the “User Interface Overlay”.

Once the perspective matches the photo. I strongly recommend saving your camera’s view by creating a view to save your Enscape camera settings. 

It is equally important to lock that 3d View  So there are no accidental camera adjustments in Revit.

This should act as a save point that you can return to in case of any camera movements.


The next step is to edit your settings for an optimal image.  If there are accidental camera movements you can return to your previously saved perspective by selecting it in the Enscape Active Document rolldown menu.
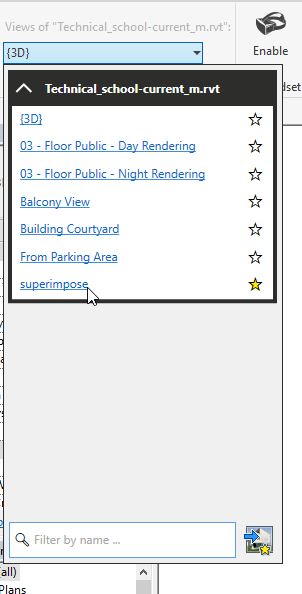
 

All that is left to do is to export the building image from Enscape into Photoshop.


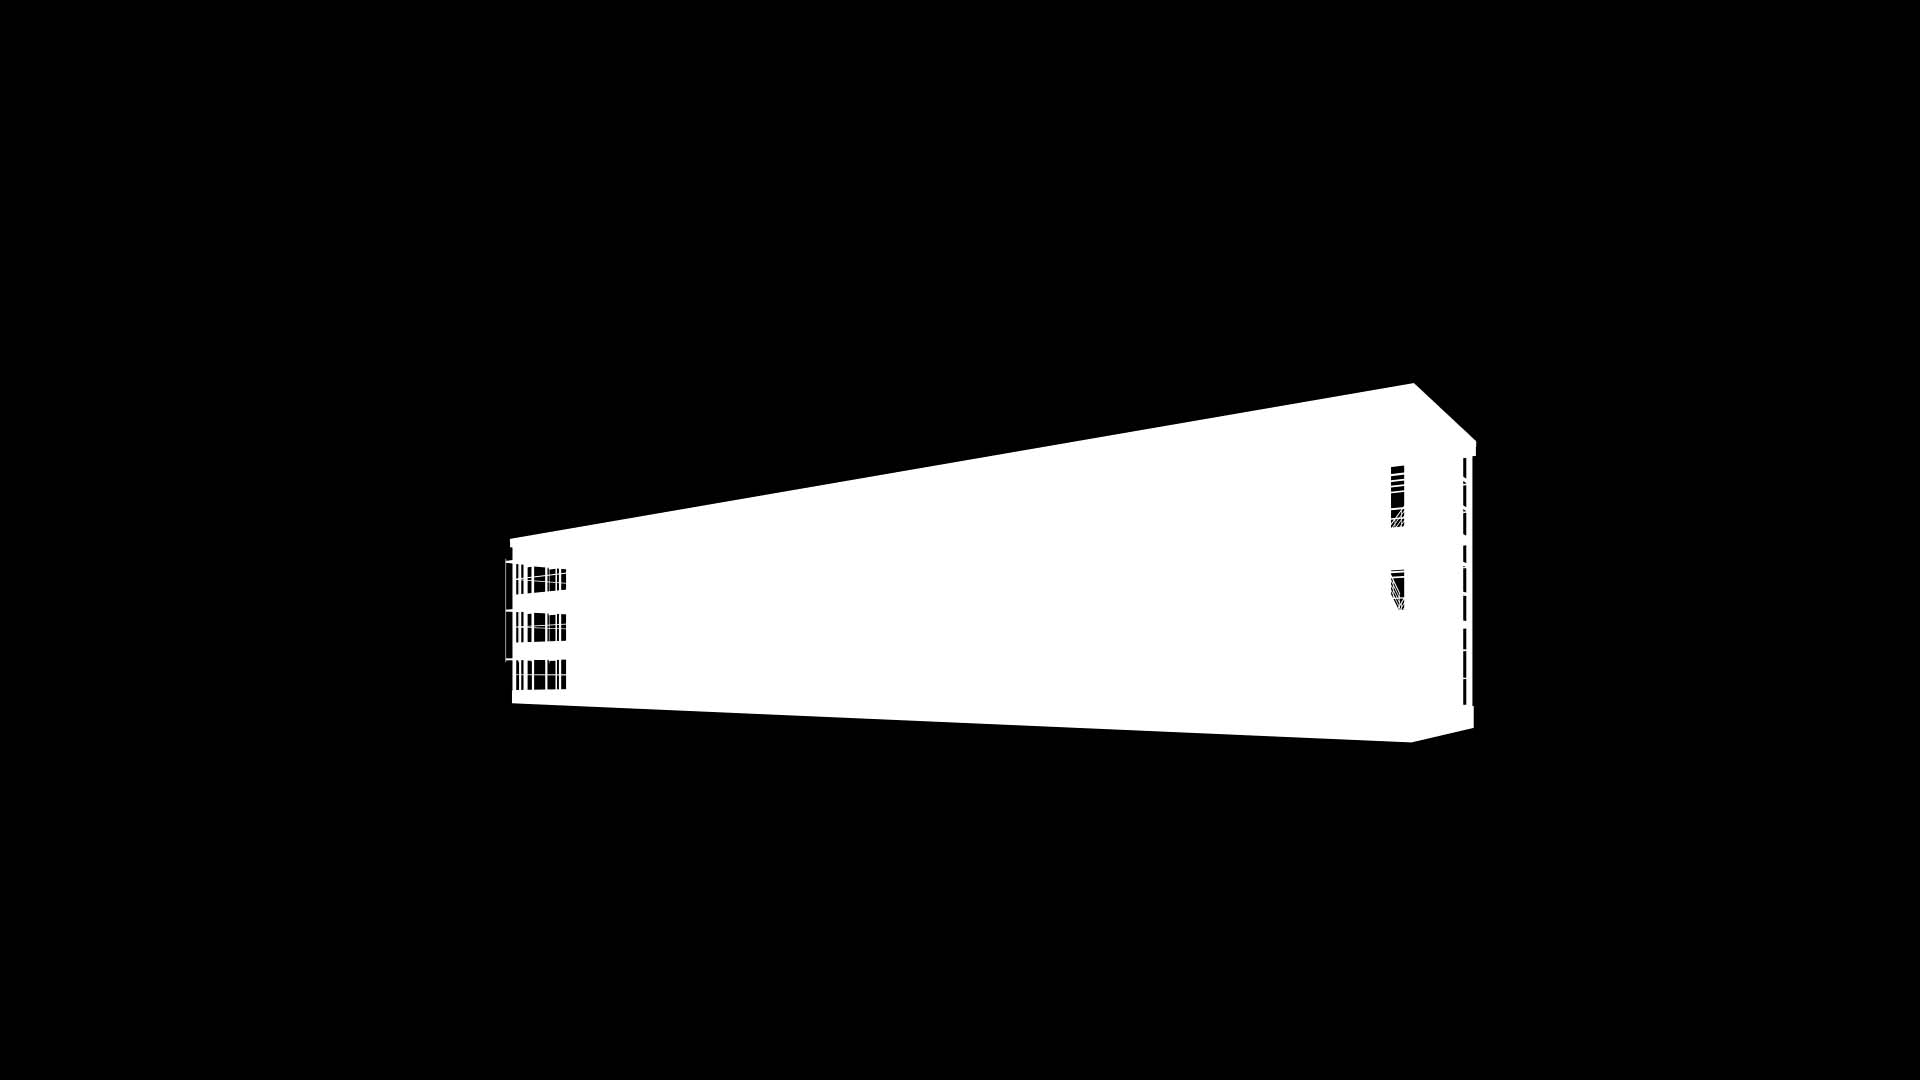
Exporting the images is a 2 step process. In the Capture tab of the Enscape Settings. Click on the Export Material-ID and Depth checkbox so Enscape produces an image that can be used as an alpha channel. It is important to push the Depth Range all the way to the right in order for this to work correctly. I like using the Targa file format when dealing with images that are about to be processed. PNG could be used as well but old graphic design habits die hard.
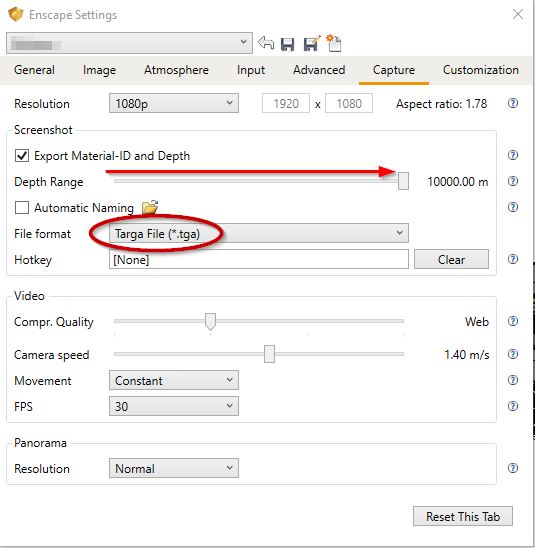

Exporting should produce two images. One is of the building & the alpha channel map.
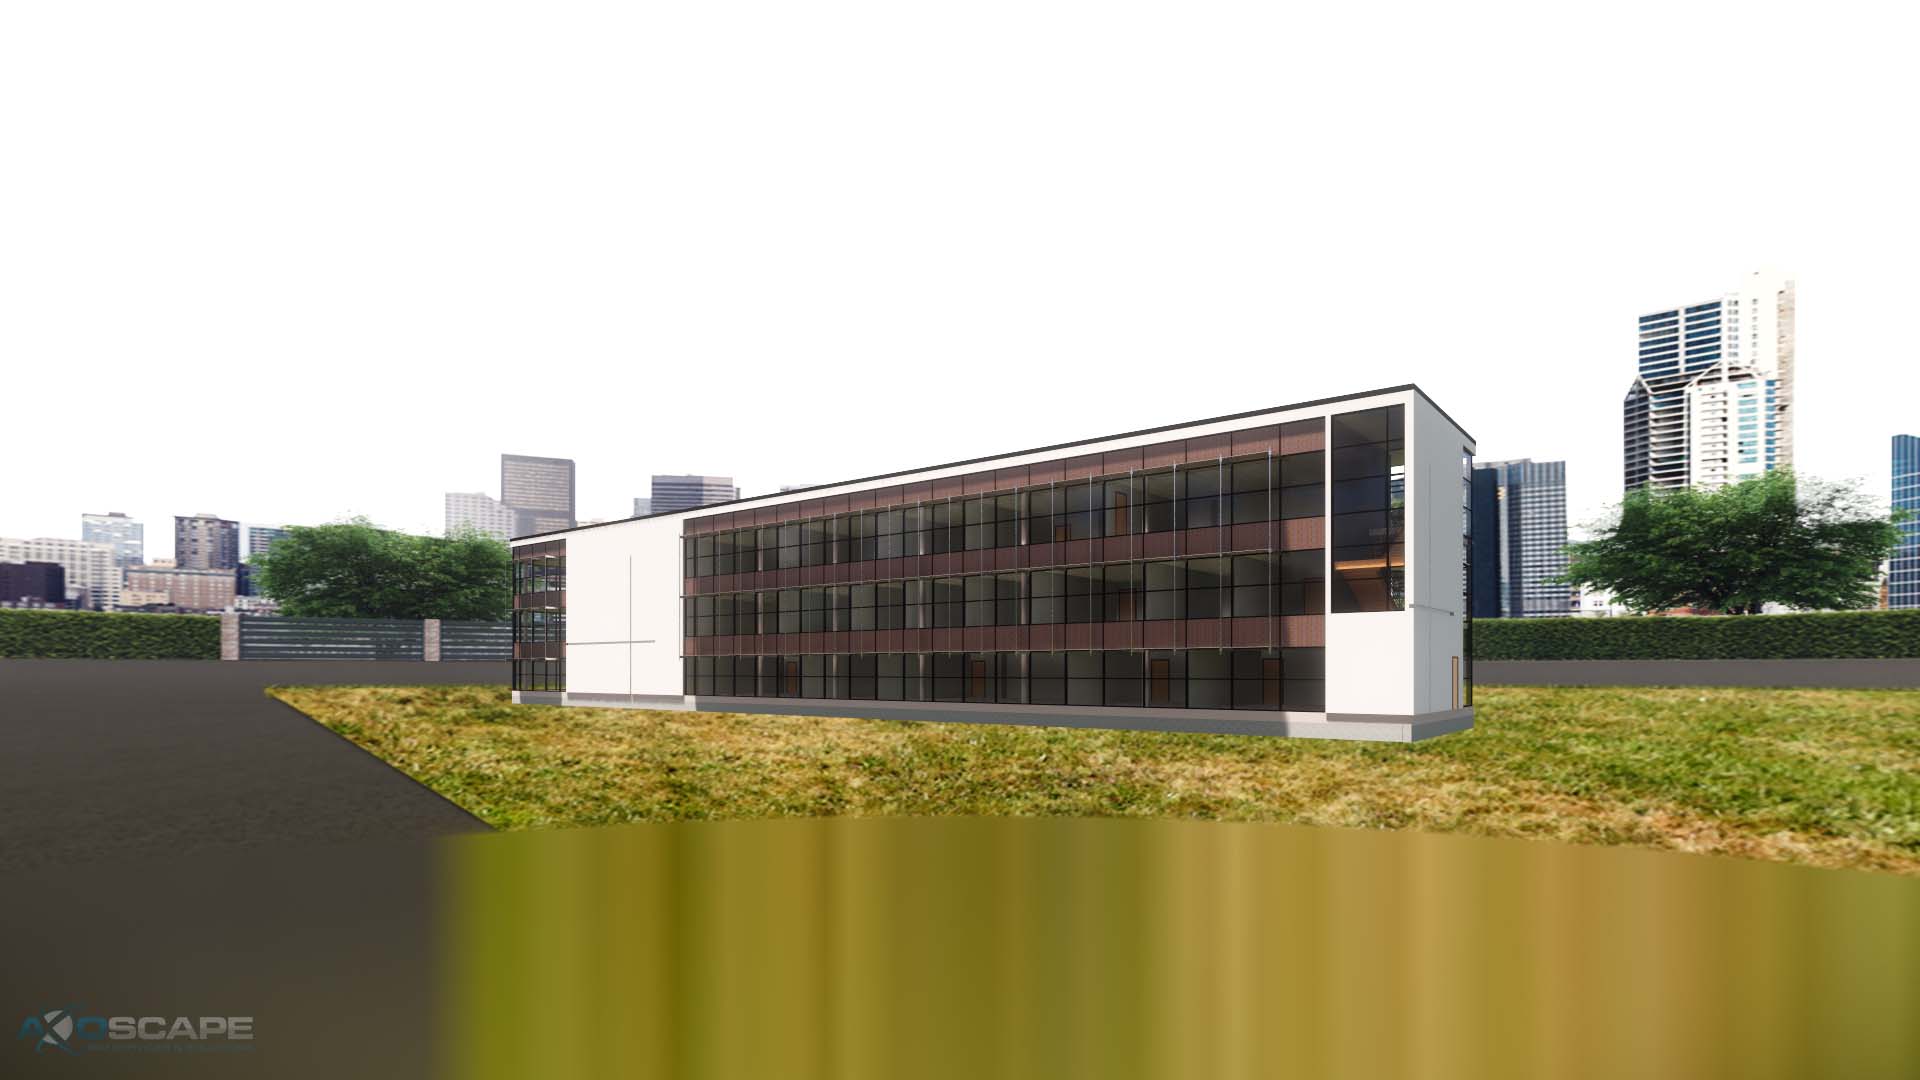
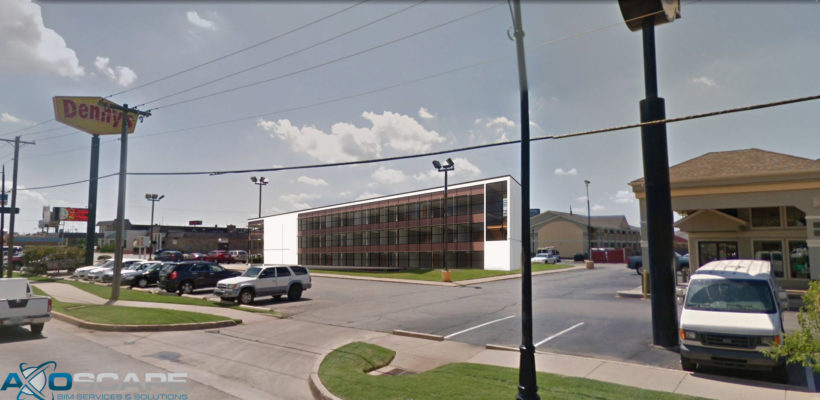
At the end of this workflow, you should have 2 Enscape images that fit the perspective of another photo that are ready for superimposing.



Read More

Enscape Camera Guide

In this guide, we will be covering cameras in Enscape.

I will be using the 2018 sample Revit building. Once in Enscape, navigate to the spot you want to begin the animation.

Once you have picked the point where you want to begin the animation, tweak the lighting to your liking, frame your scene and press “K” to add a keyframe.

Don’t worry too much about the angle of the shot or the lighting as those settings can be changed anytime. Right now focus on the path you want the camera to take.

Move to the next point and repeat the above steps to create the different keyframes of the walkthrough.

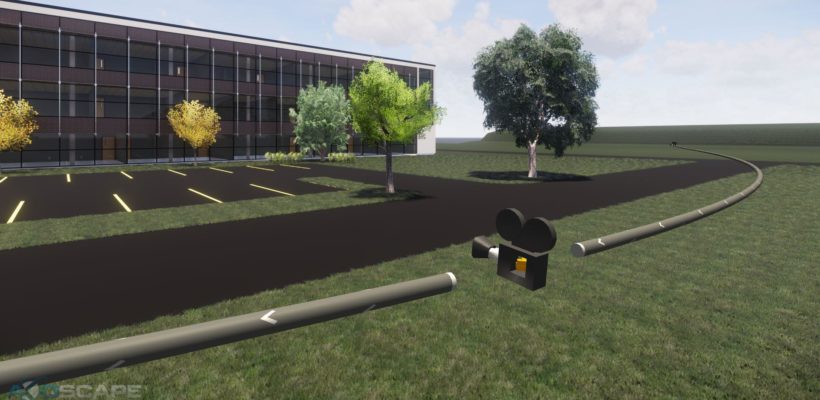
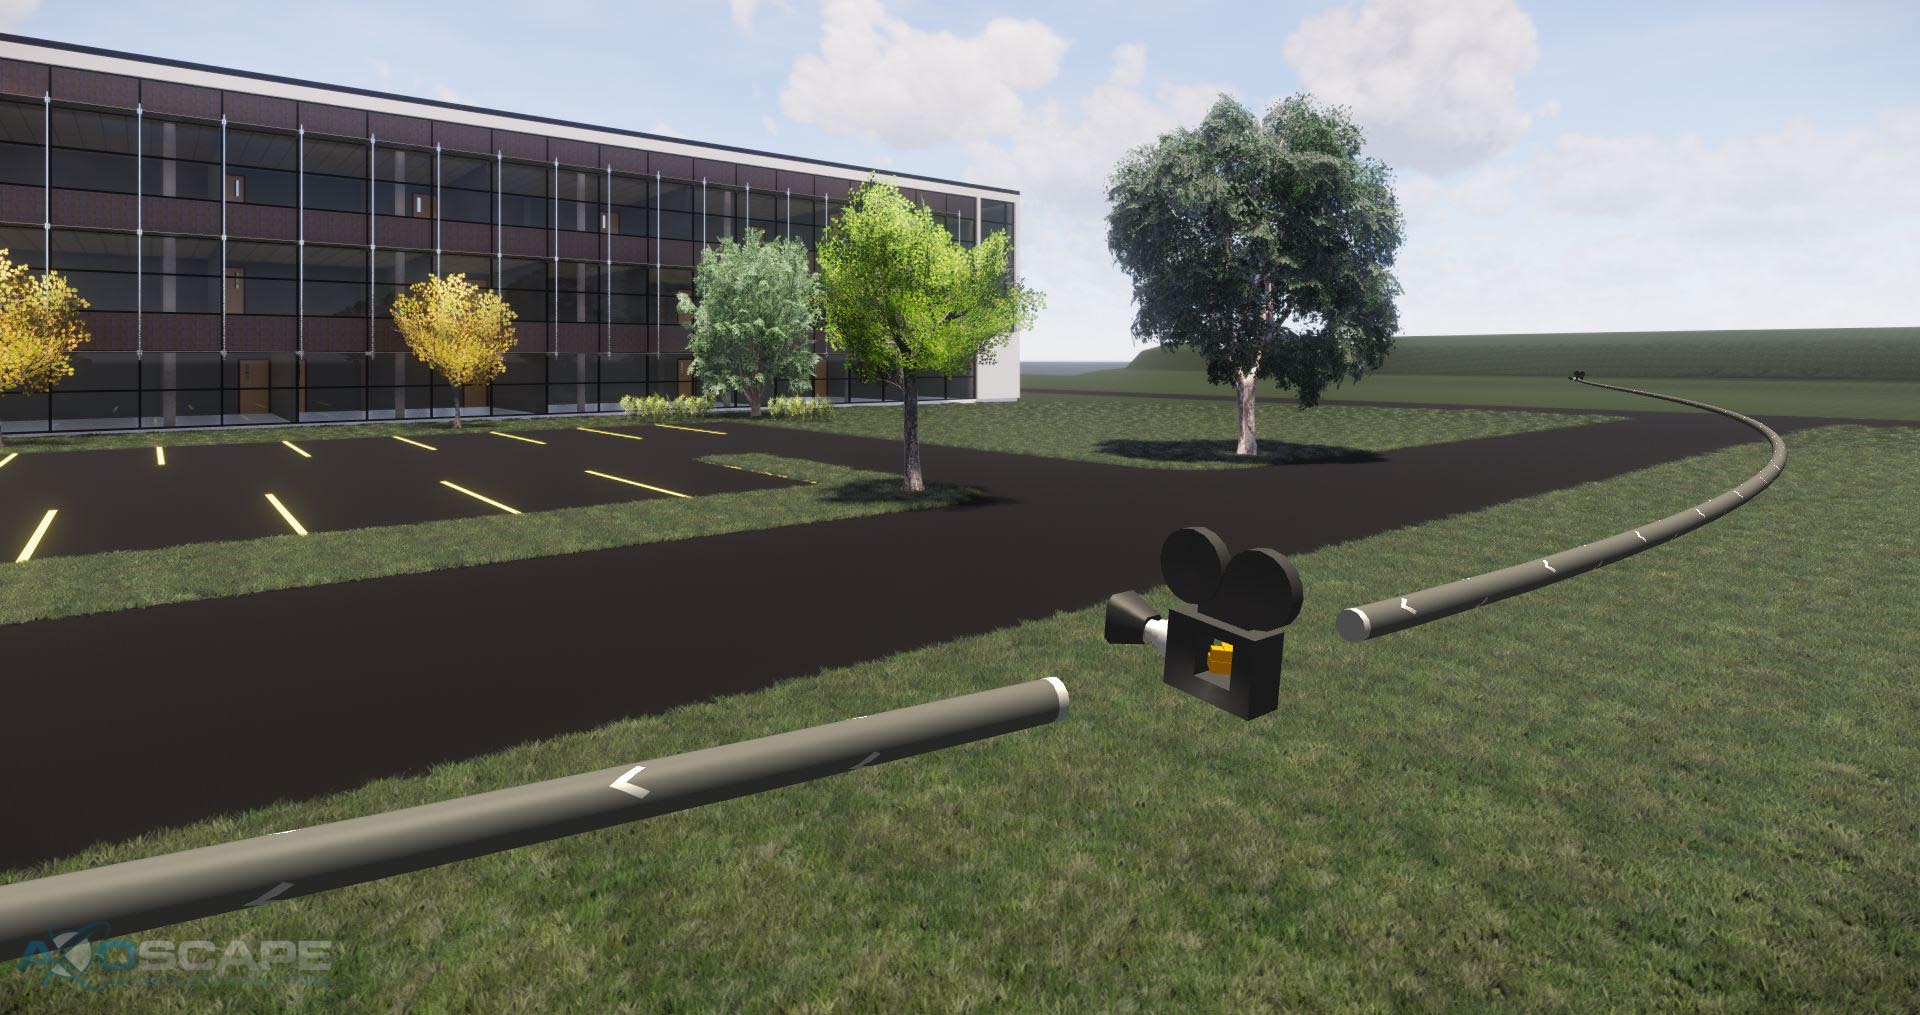
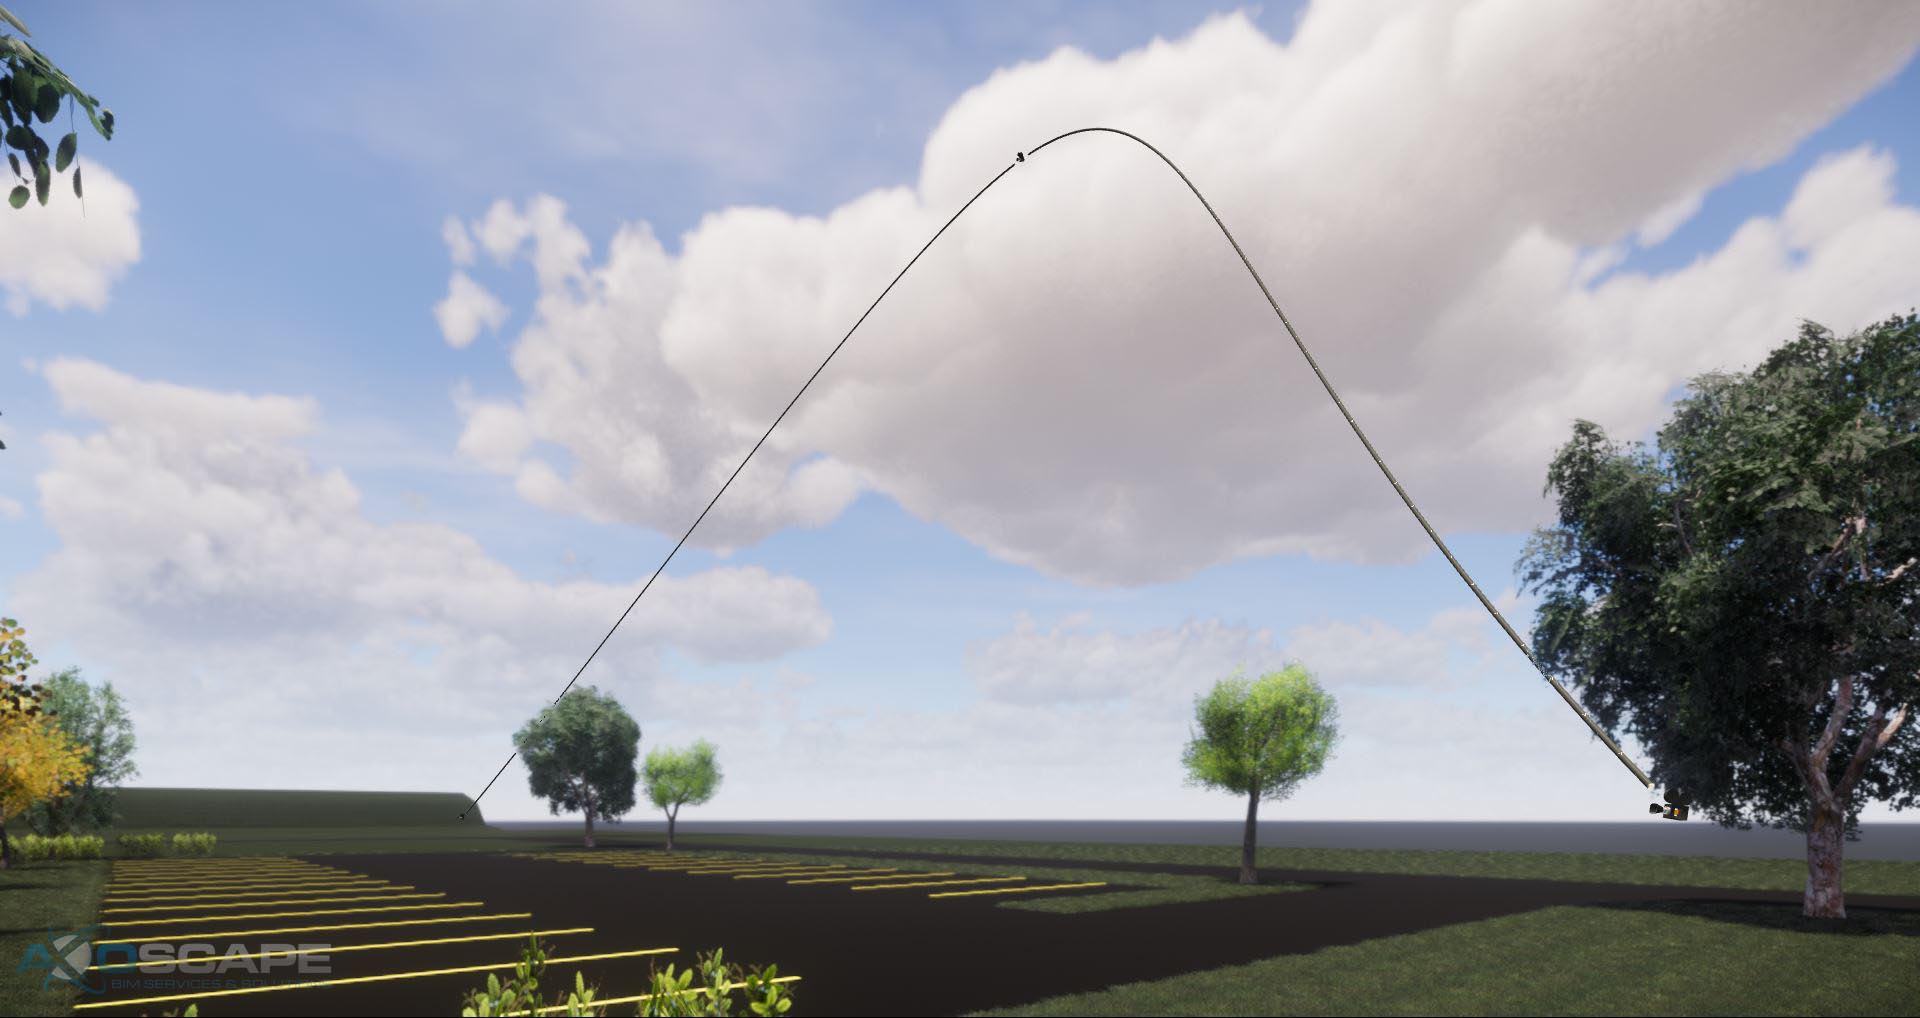
Once you’ve added the keyframes a visual representation of the camera path should appear.

This path is extremely helpful for a couple of reasons. It shows the direction of the camera path, the focal point of the keyframes and is completely interactive.

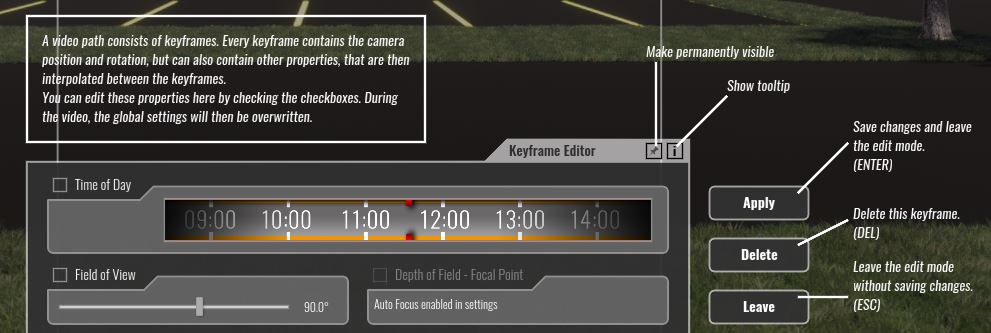
The camera object on the path represents the keyframes and can be edited. Clicking on a camera will bring up the keyframe editor.

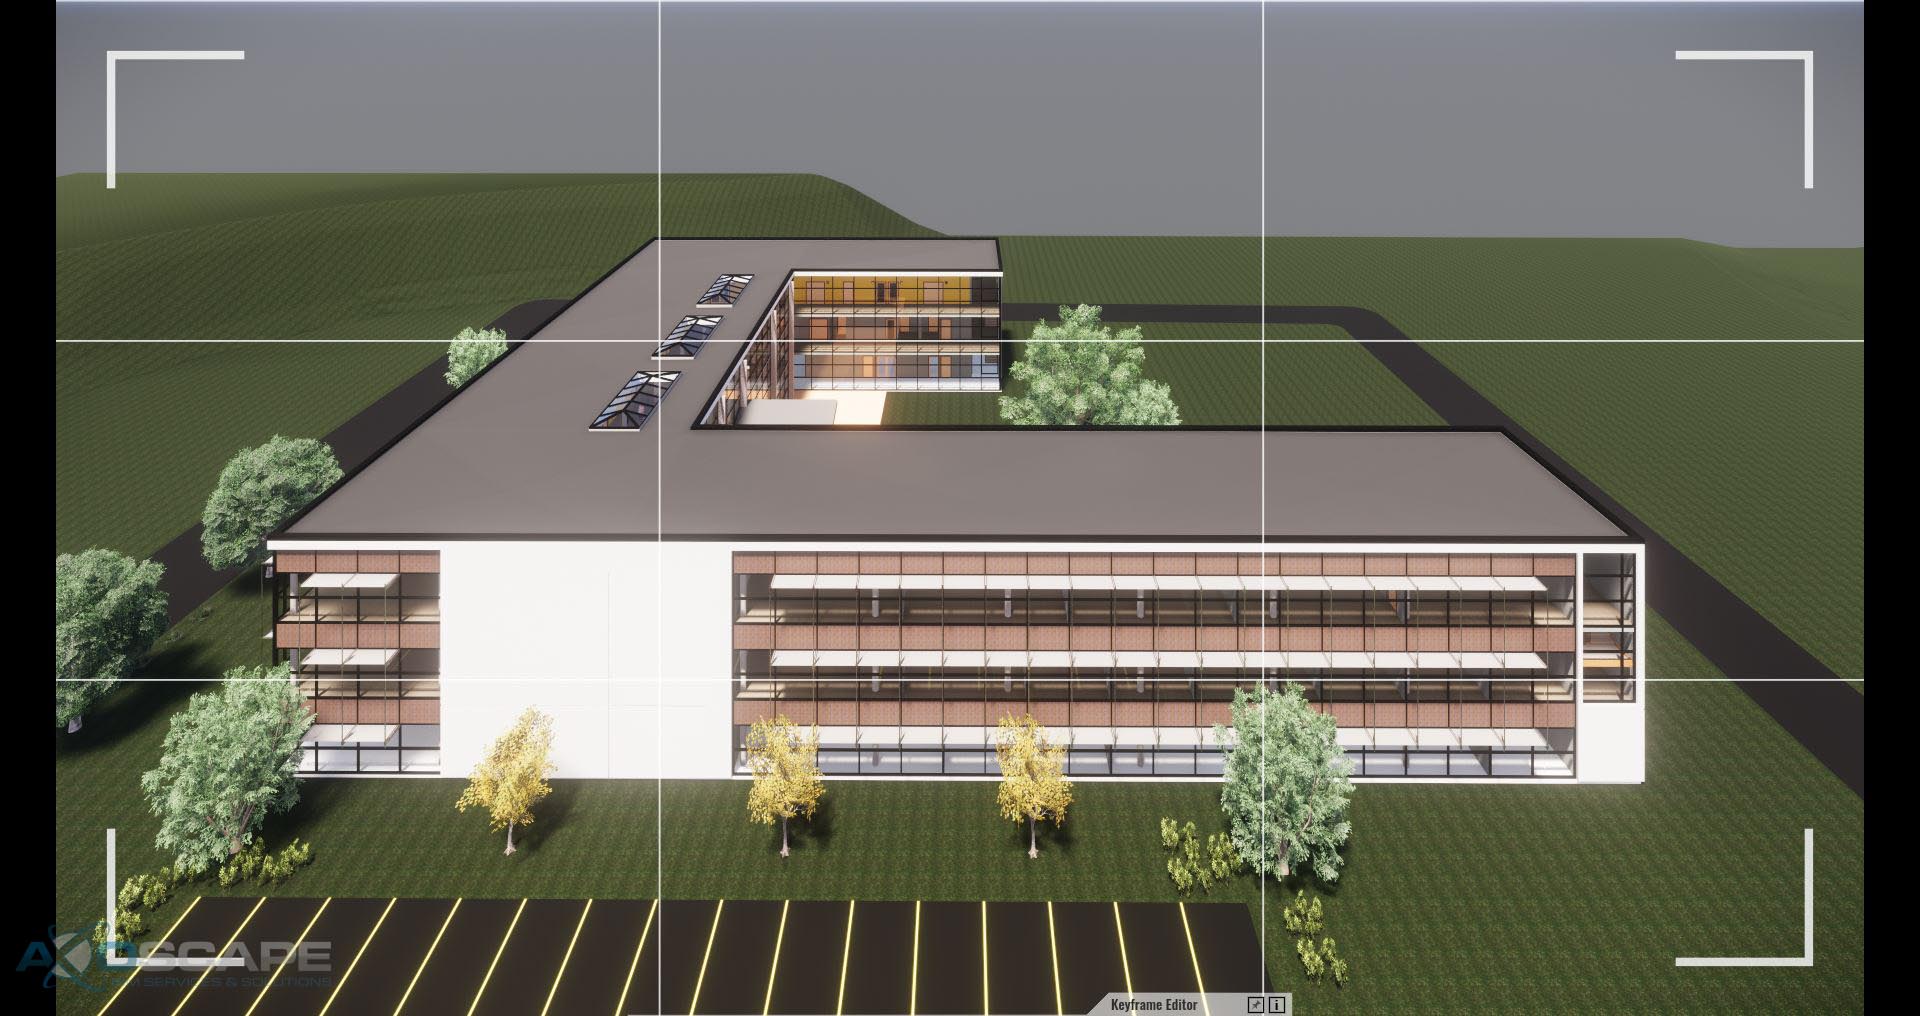
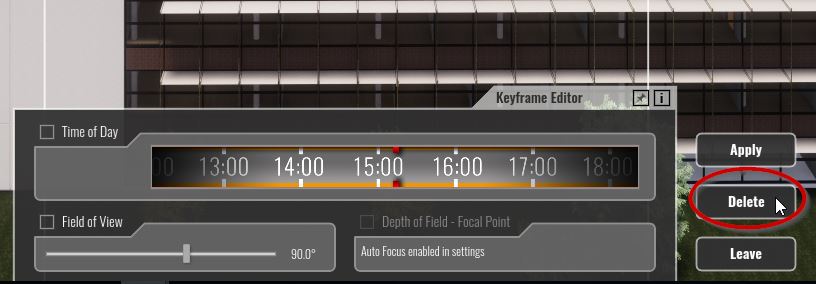
This user interface will let you change all the details within a keyframe.  Along with these settings, the rotation of camera and position can also be edited. For example, let’s select the center keyframe and fly the camera above the building. The camera path will adopt this new position and adjust for the change automatically between the three keyframes. Be sure to accept the changes by click on “Apply” to save your changes.

Another useful feature is the ability to delete and add keyframes in an existing path.

To delete a keyframe select the keyframe you want to be removed and click on delete. This will remove the keyframe from the camera path. To my knowledge, this action is non-reversible.

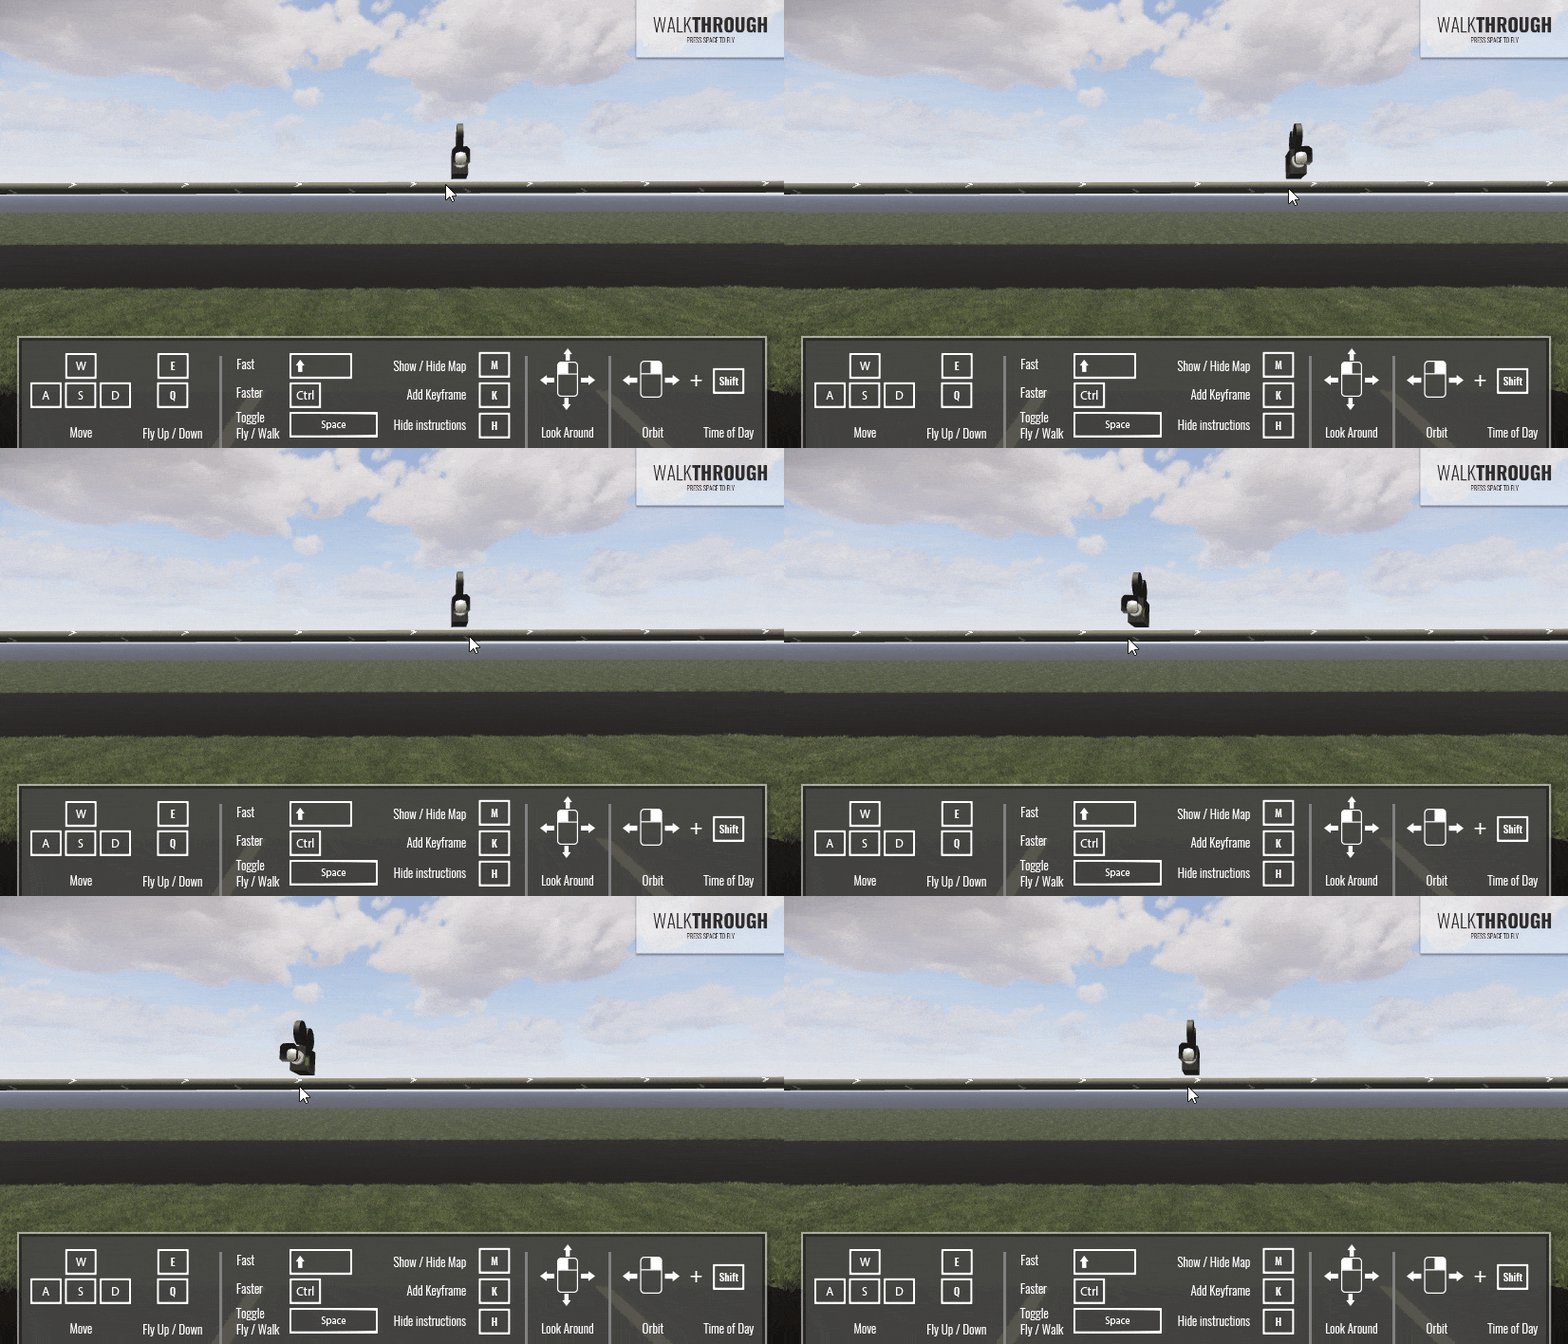
Adding a keyframe is just as easy, simply hover over any portion of the camera path and click to create a keyframe.

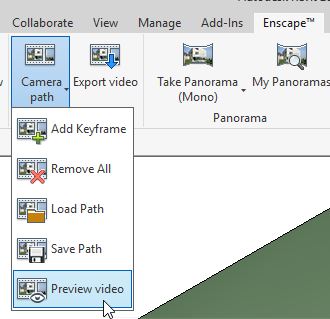
Once all the keyframes have been adjusted and created, test the animation with the preview video command in the Enscape Tab.

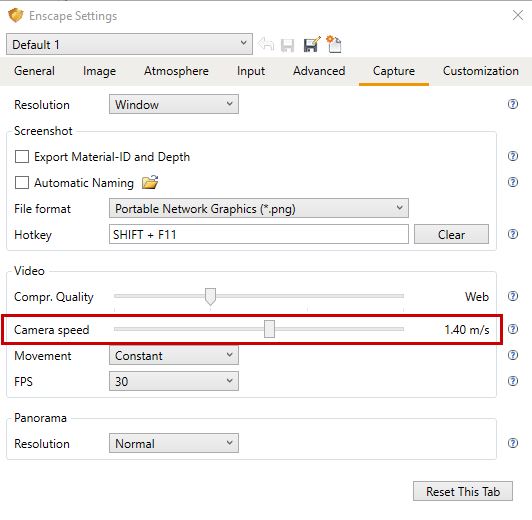
To adjust the speed of the camera go to Enscape settings and adjust the camera speed slider

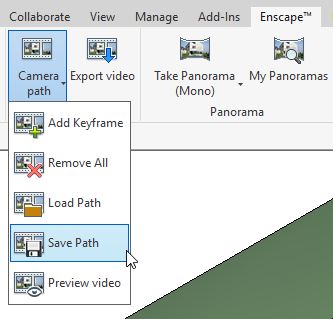
After finalizing all settings, saving the path will export an XML file.

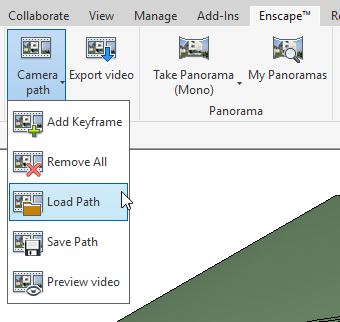
At this point, the path has been created,  tweaked, finalized and exported. All that is left to do is to either Export the video or distribute the XML to others to load.

Alternatively, if your computer can handle it, using a screen capture tool to capture the preview video is a great way to get footage for the purposes of finalizing walk through paths. It’ll save a lot of time but it may not give you the quality depending on your needs.


Read More

Enscape Color Bleed Tweaks

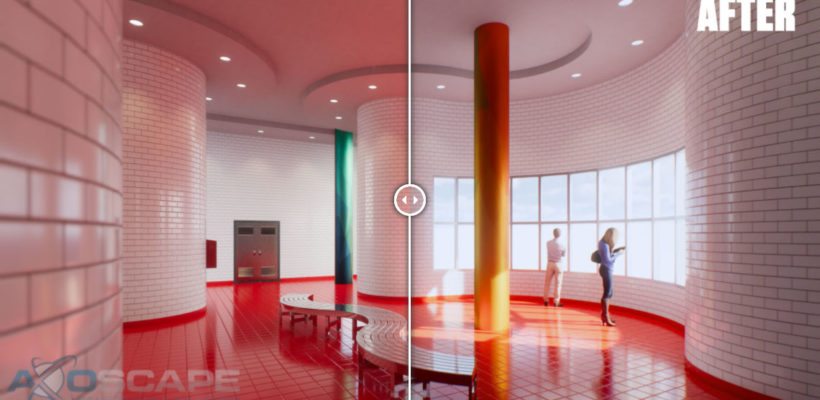
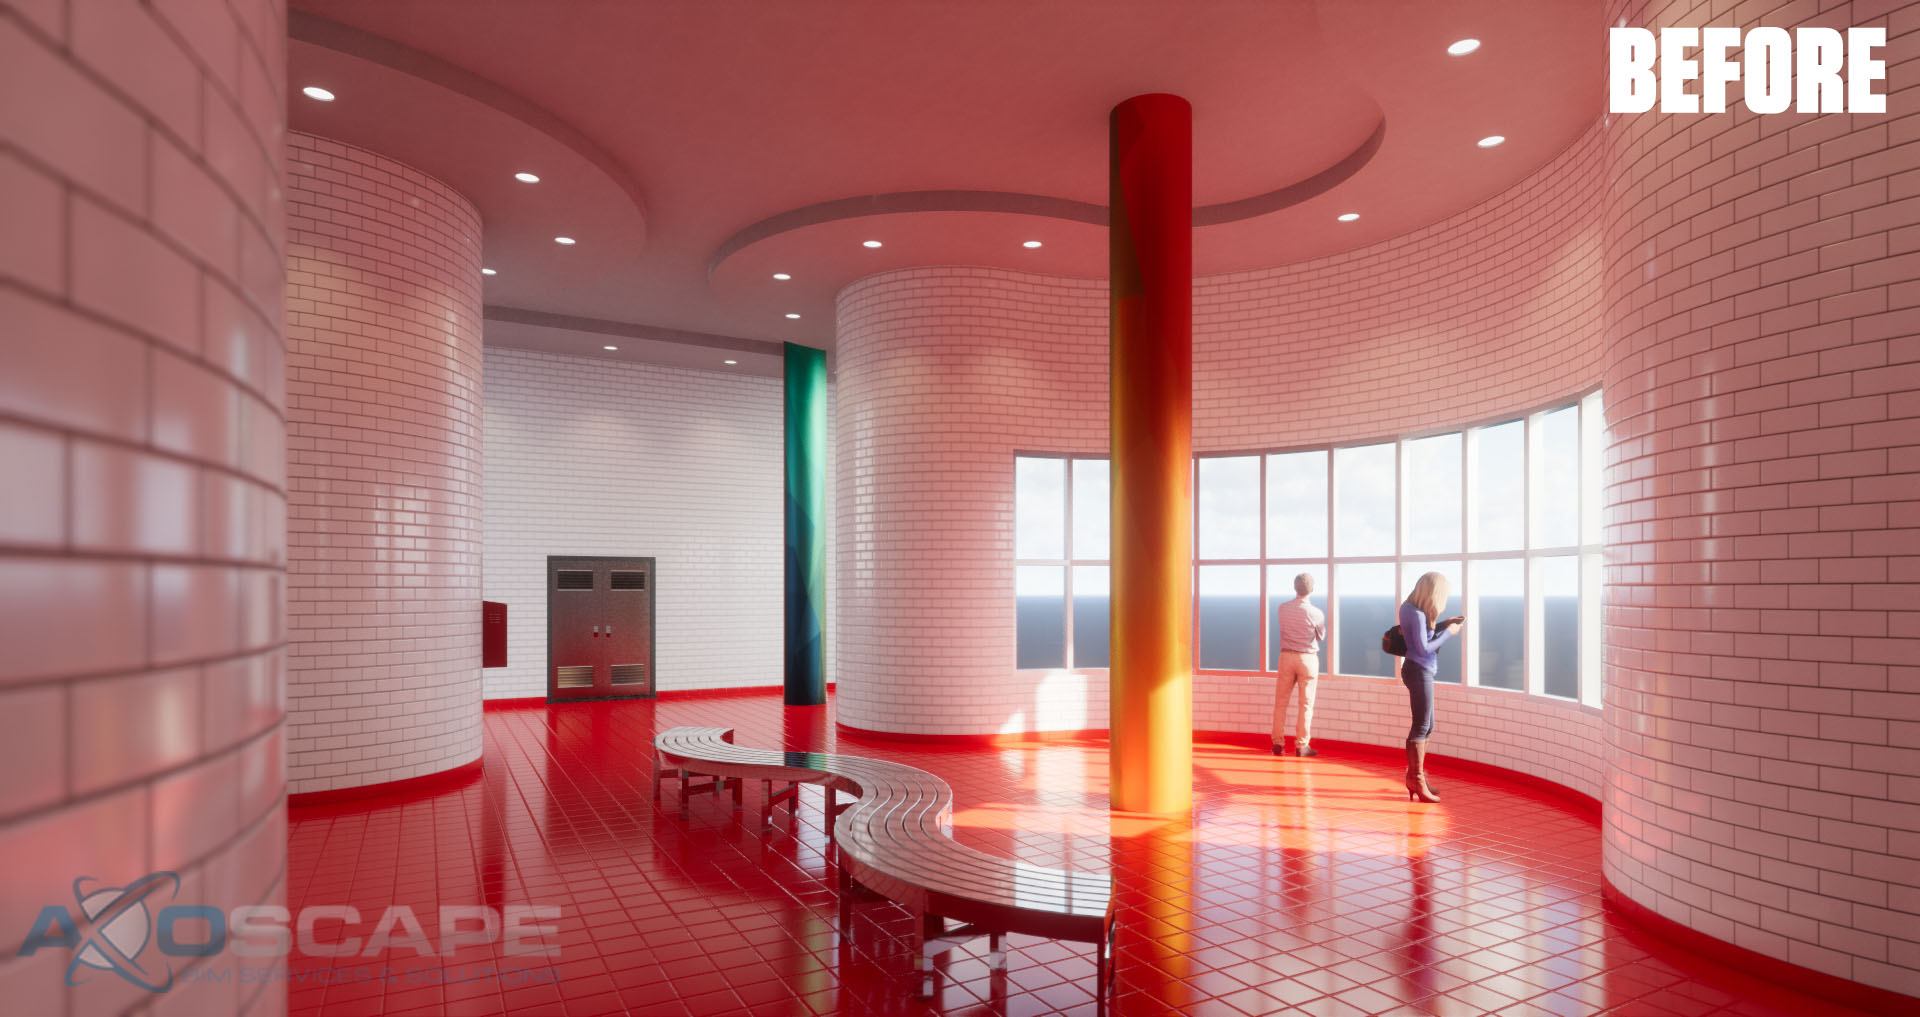
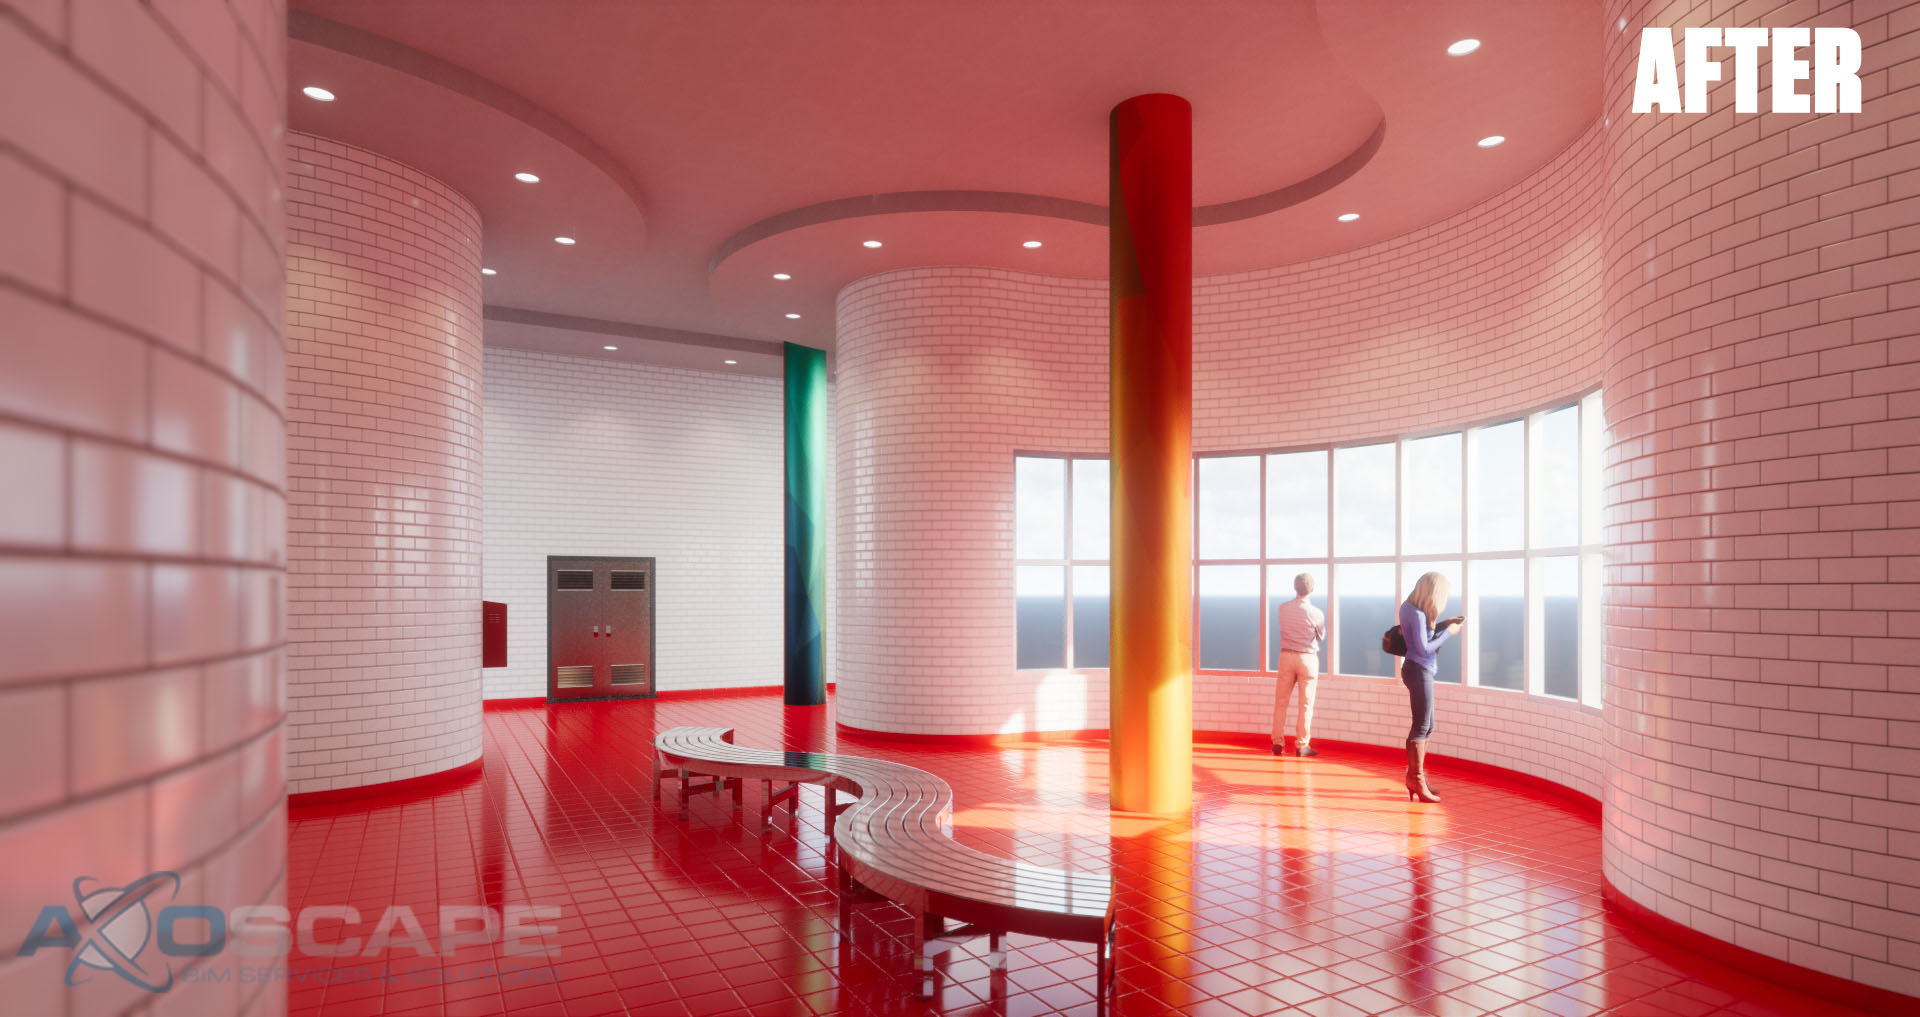
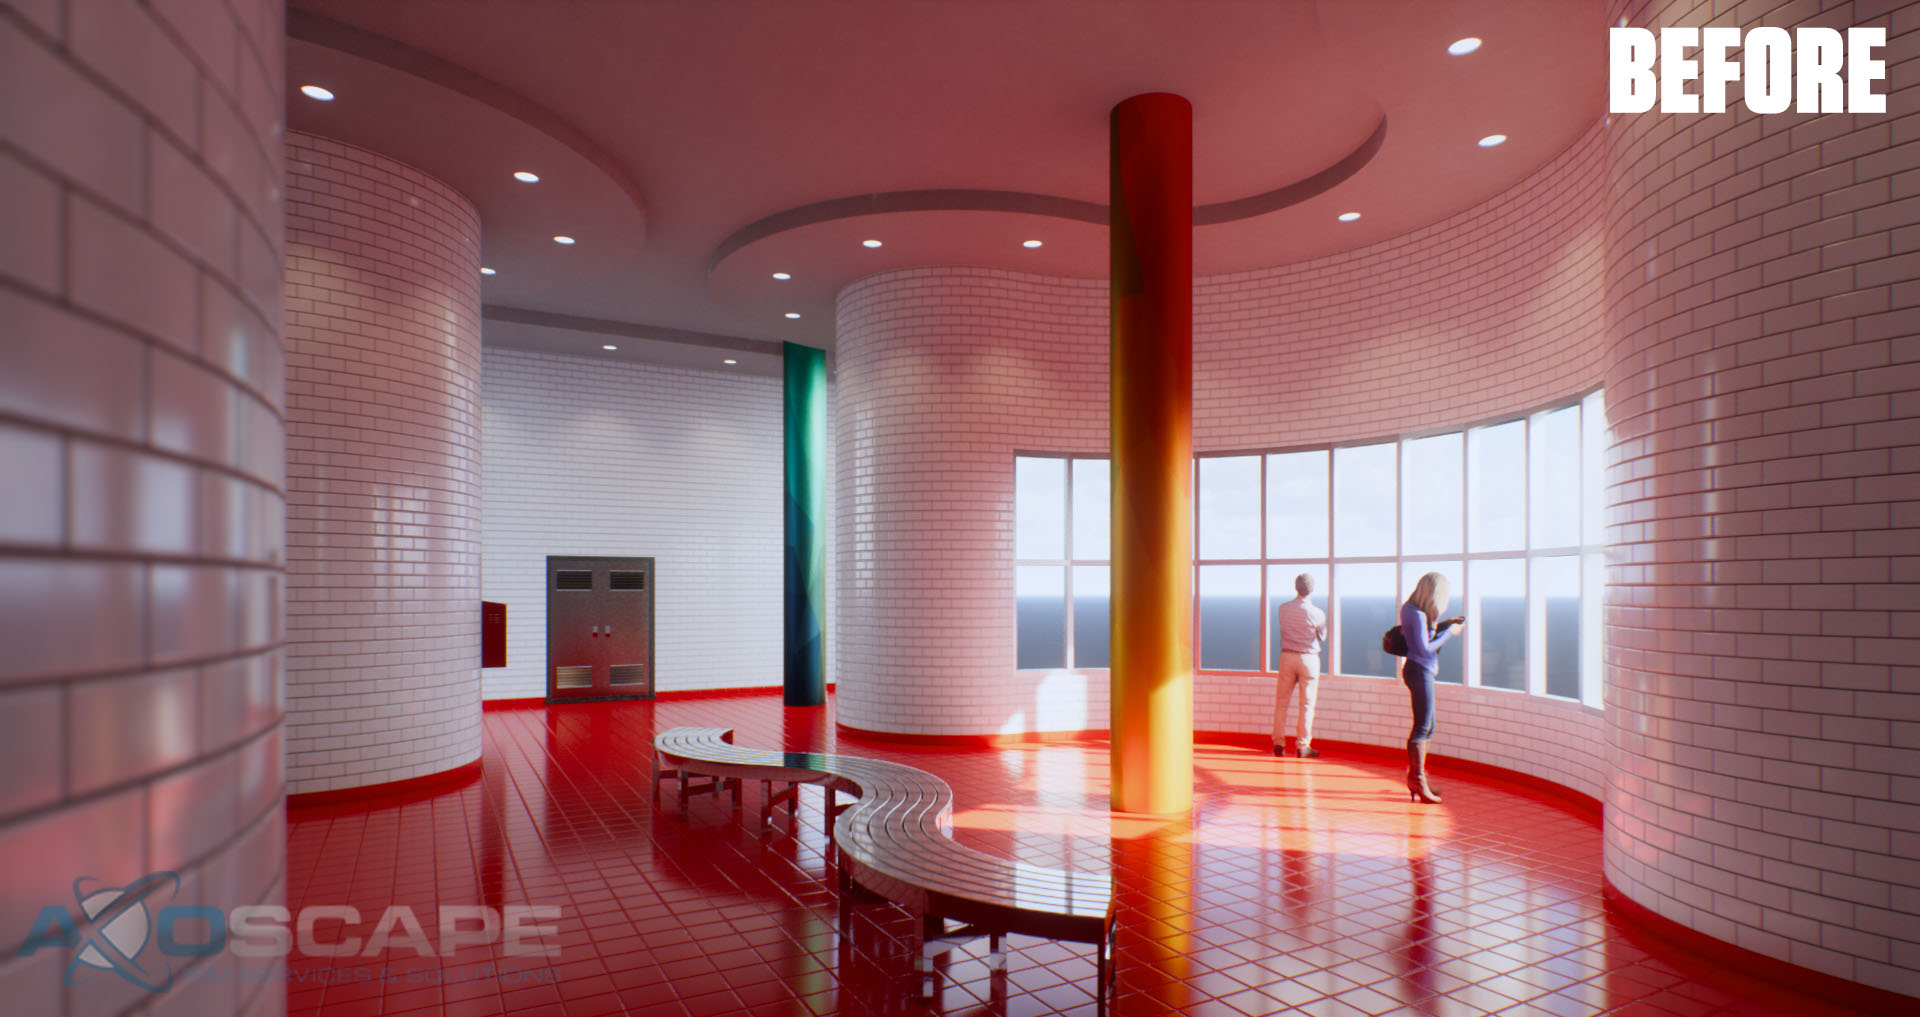
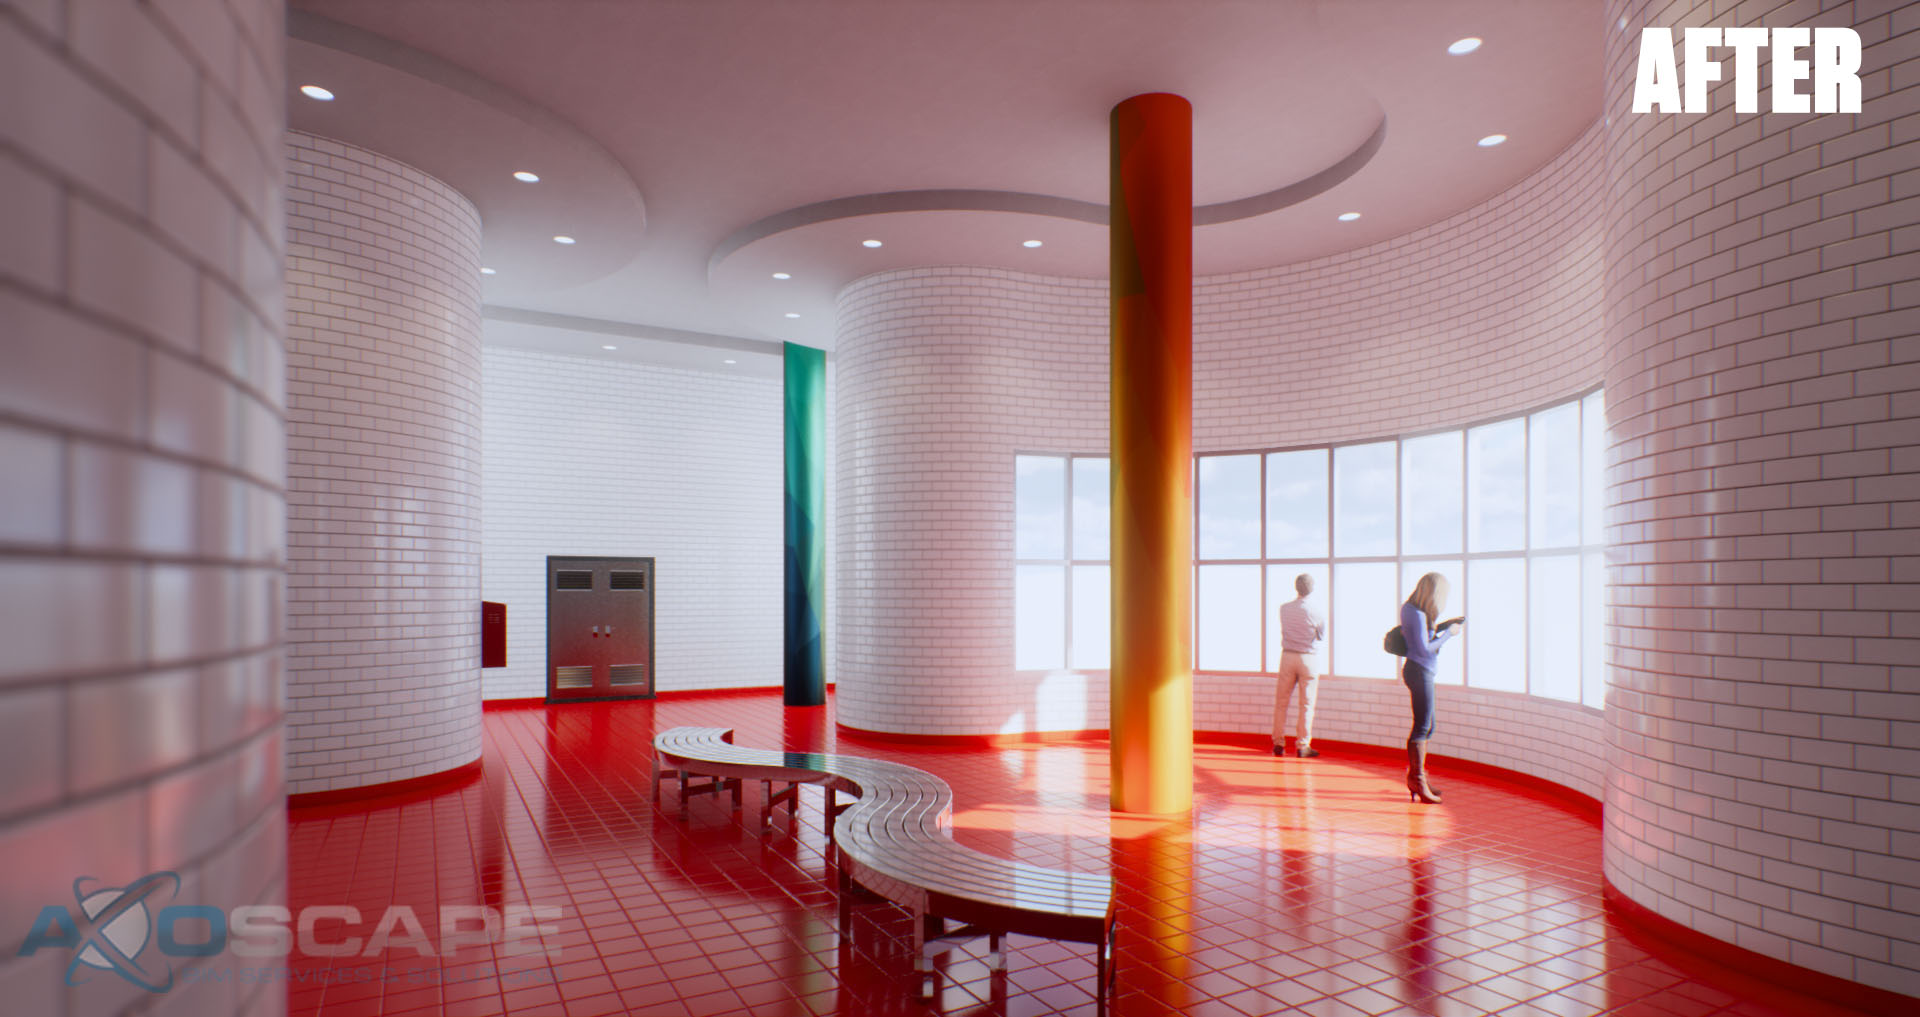
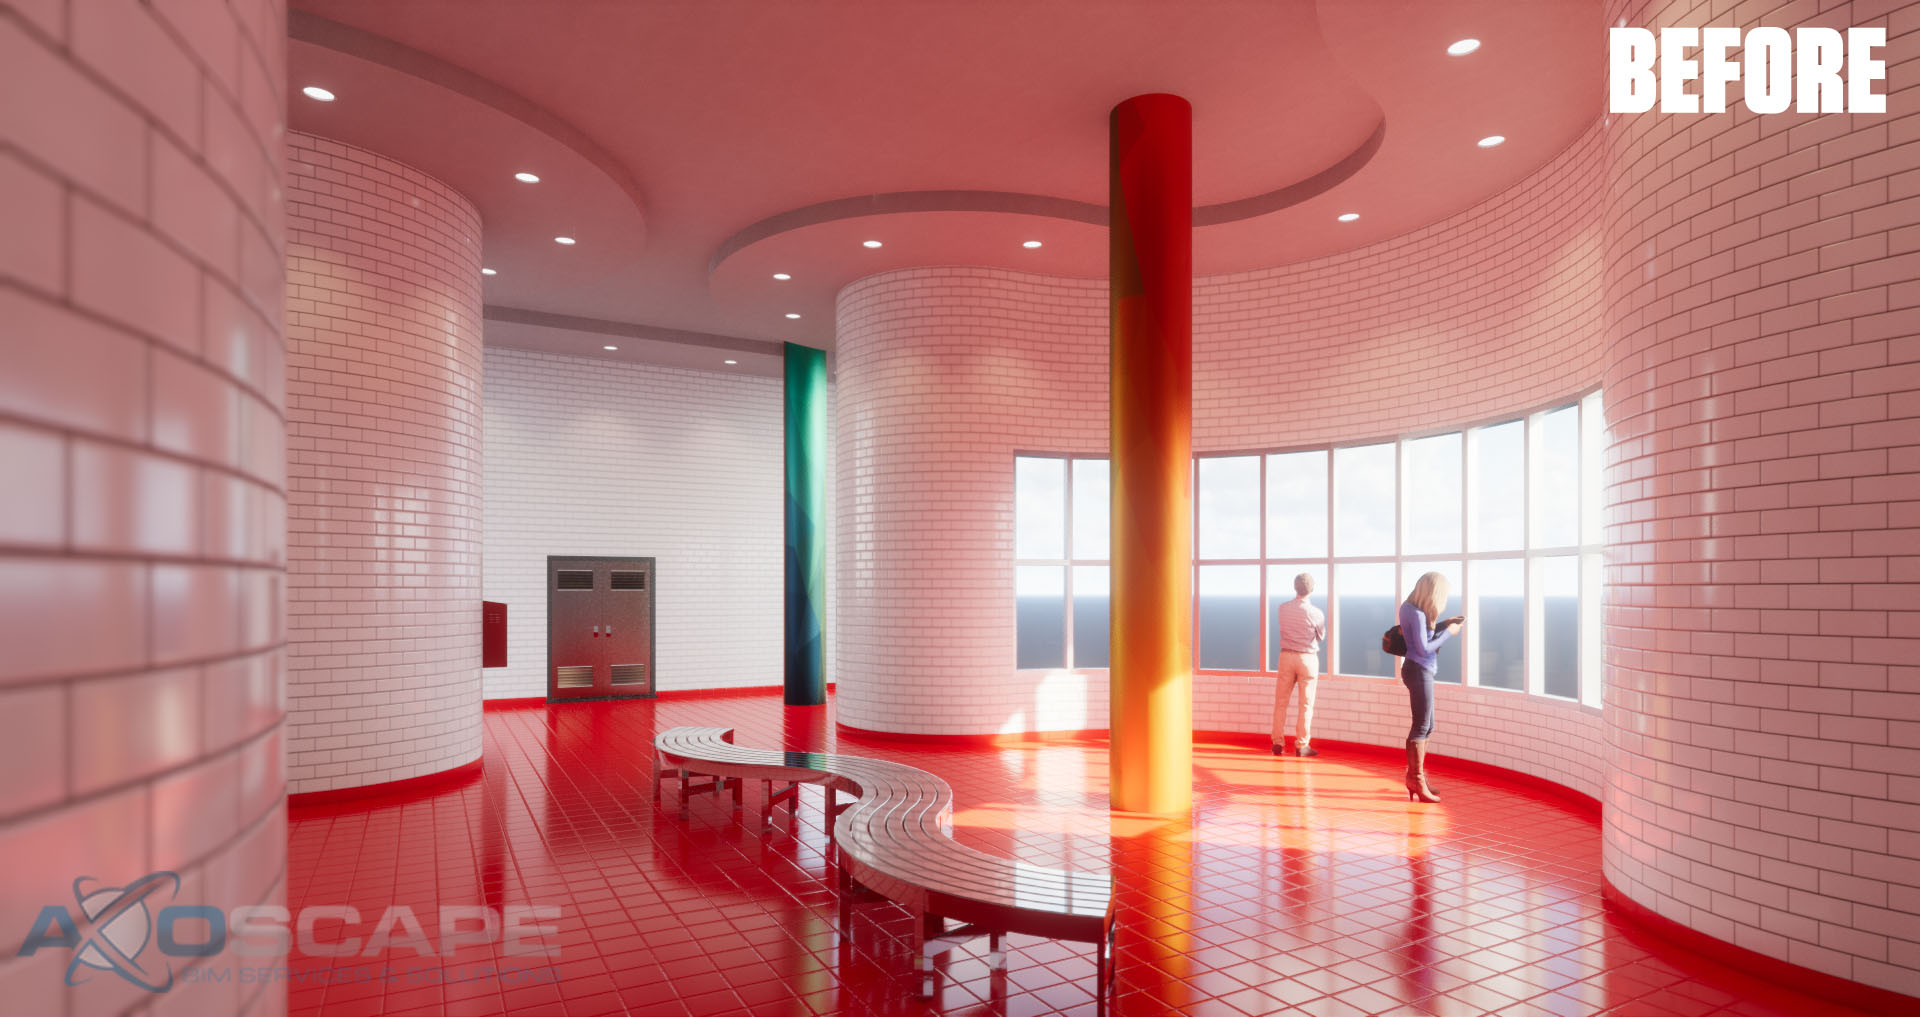
Physics-based lighting engines have been the defacto go-to for renderings in recent times because of their jaw-dropping results and ease of use.  Enscape is one of these amazing engines and is quickly becoming the visualization plugin of choice for Revit due to the real-time feedback interchange between Revit and Enscape.  One of the hurdles of dealing with any physics-based lighting engine is the issue of color bleeding.  This can happen with scenes where a strong primary color, such as red/blue/green, bleeds onto neutral color surfaces resulting in unwanted color bleed.  This article will go over ways to overcome this issue using only Enscape setting sliders.


To open the setting sliders, click on the settings button under the Enscape tab.


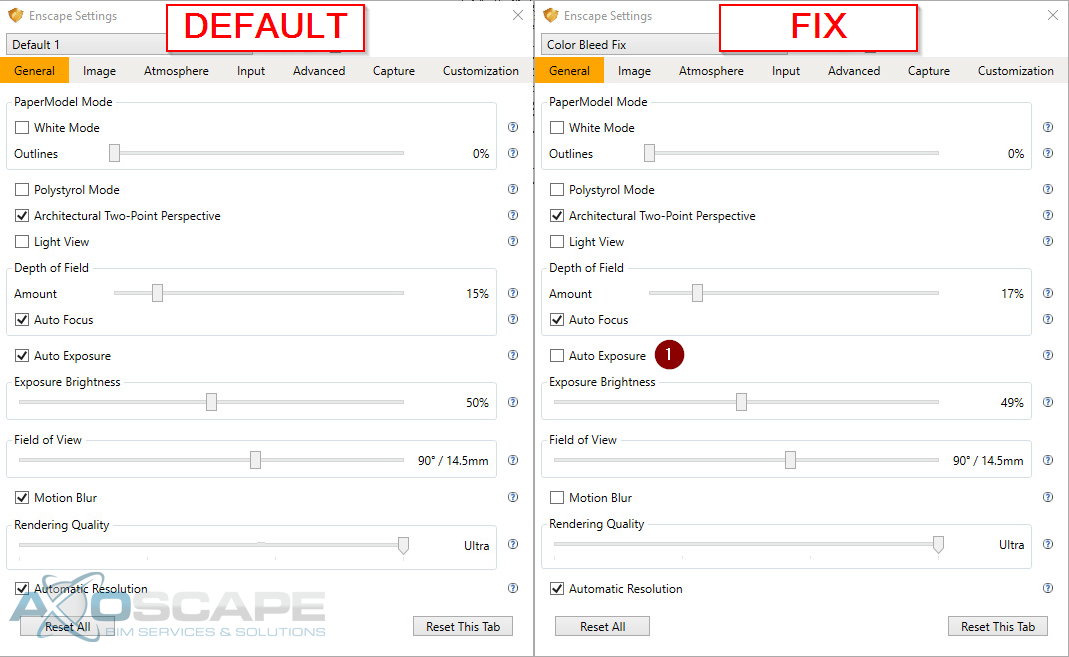
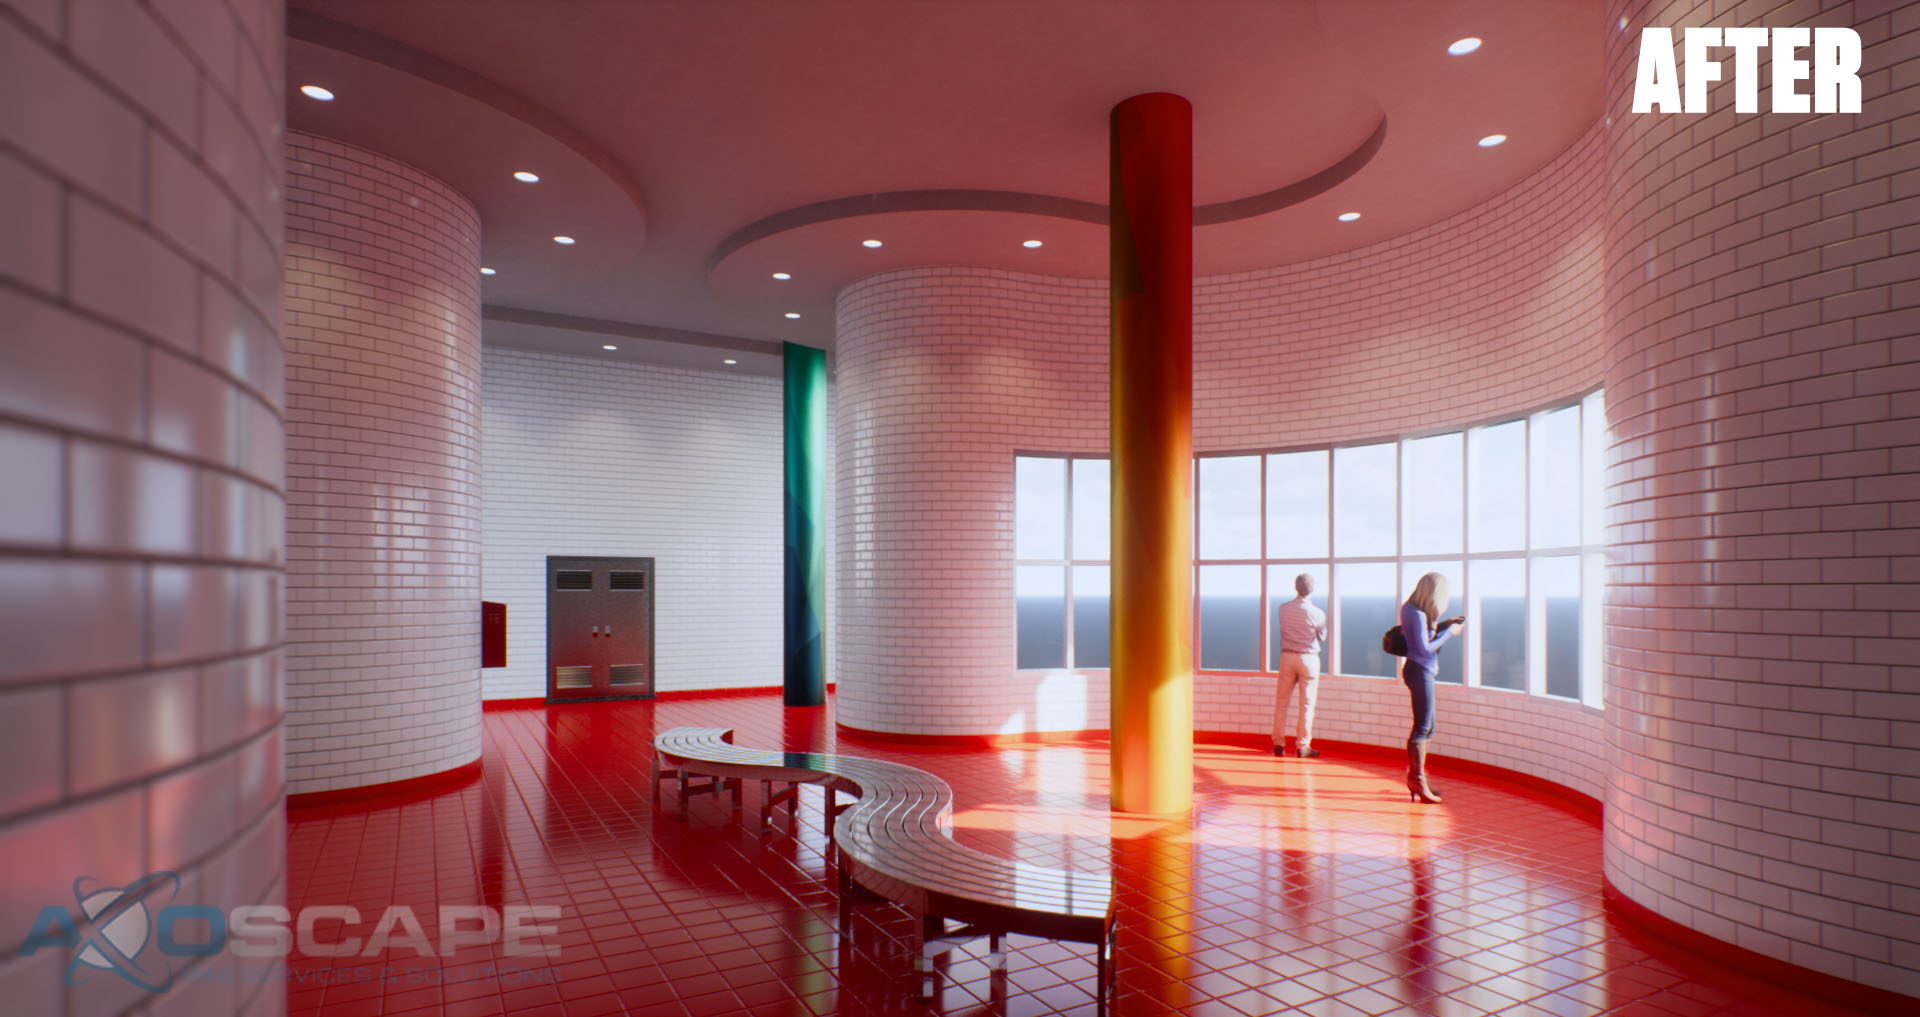
The general tab should present itself when opening settings. Below is a side by side comparison between the settings for the before/after images. 

Uncheck Auto Exposure
By default, Enscape will try to adjust the light exposure of the scene based on dark/light levels. Because of the settings being made later in the article will affect this automation, it is best to uncheck and manually adjust as needed.


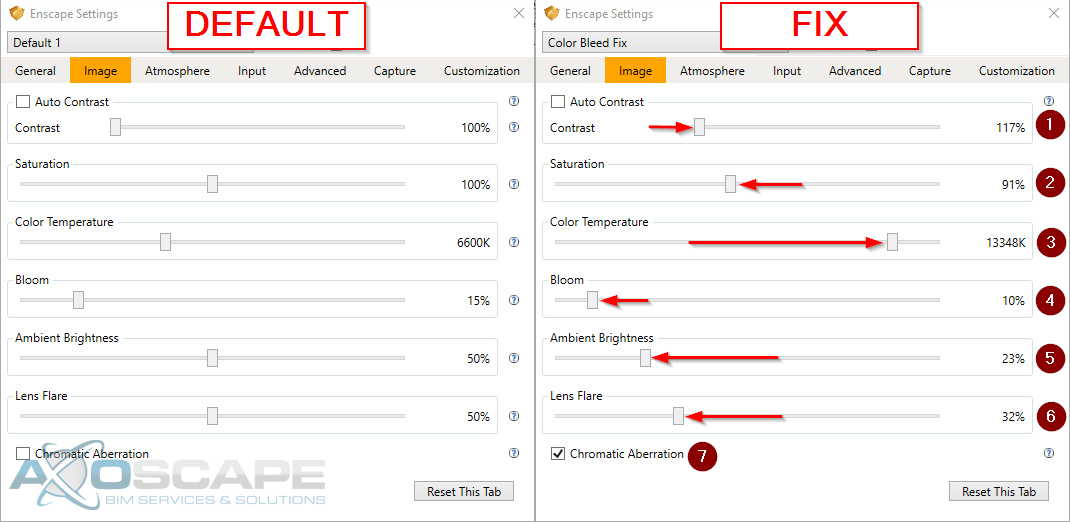
Image settings contain the most important tweaks when dealing with lighting, color, and effects.

  1. Raise Contrast
    This setting should boost the color output which is important to do because lowering the saturation will drown out the colors.
  2. Lowering Saturation
    This will help remove some of the color bleedings from walls and ceilings but will need contrast to help bring back color to elements that fade.
  3. Raise Color Temperature
    Color temperature will either make the scene (lower) warmer or (higher) cooler. In this case, the color red is bleeding, by moving the slider to the right it helps negate the red color by balancing out the image with cooler (blue).
  4. Lower Bloom
    This setting does not impact color bleeding but due to the changes to the default lighting settings. This may be adjusted so bloom doesn’t overpower the scene and make the lit areas too fuzzy.
  5. Lower Ambient Brightness
    Ambient brightness helps provide a scene with additional lighting when the natural or artificial light is lacking.  Normally this is a great way to increase lighting but because of the color bleeding issue increasing this setting will exacerbate the red color being bounced by the lighting engine.  Lowering this slider will help prevent color bounces and reducing color bleed overall.
  6. Reduce Lens Flare
    Similar to the bloom setting, adjusting the lighting settings will have an effect on lens flare. In this scene reducing lens flare helped with the scene but it may vary depending.
  7. Chromatic Aberration
    This setting doesn’t affect color bleeding, but it does improve the believability of the scene.

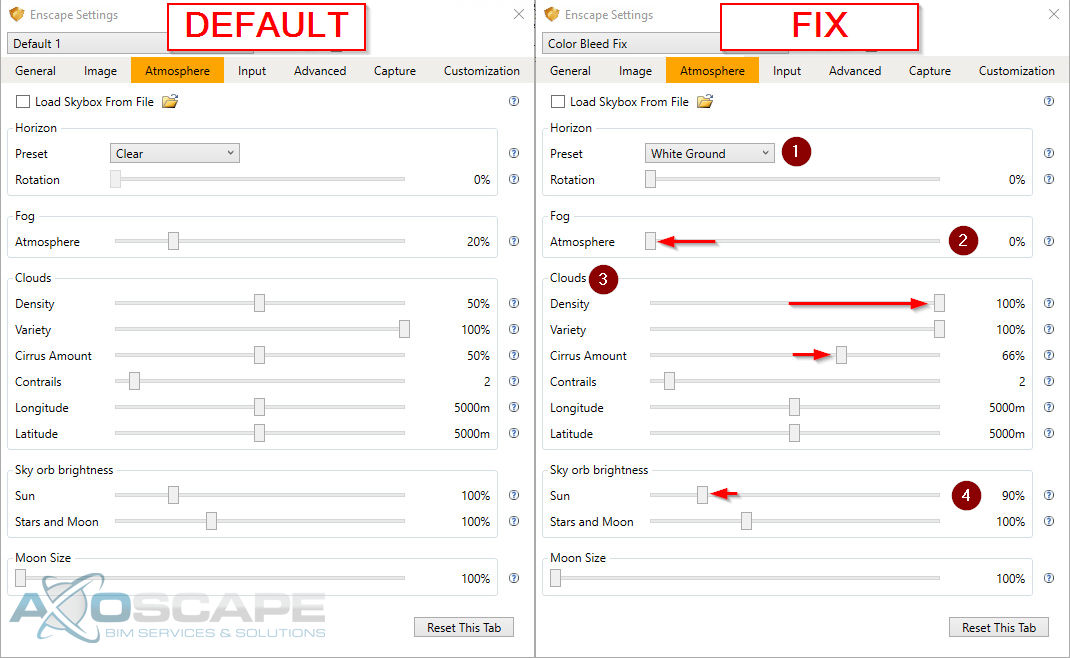
The atmosphere tab allows the scene to adopt lighting based on an external scene.

  1. Horizon Preset
    This setting has an incredible effect on the color bleeding issue.  By simply switching from “Clear” to “White Ground” the scene is provided with more neutral natural light to be bounced into interiors and reduces the color bouncing by a huge margin.  This setting may be the most important setting to negate color bleeding.
  2. Reducing Fog
    This has no bearing on color bleeding but helps with being able to see the cloud because of the lighting settings.
  3. Clouds
    Again, no bearing on color bleeding, but do adjust so clouds are visible in windows, etc…
  4. Sun orb brightness
    The sun setting controls how intense the sunlight source is, reducing/increasing the slider will depend on your scene’s needs. For the article’s example, reducing sun intensity decreased the overall brightness and prevents the image from being washed out with too much brightness.

Hopefully going over these settings will provide a deeper understanding of how they impact scenes and what to do to handle future color bleeding.


Download the Revit (2016) Scene & Materials and follow along with the article.
Enscape 2.1 required

Read More