Enscape Color Bleed Tweaks
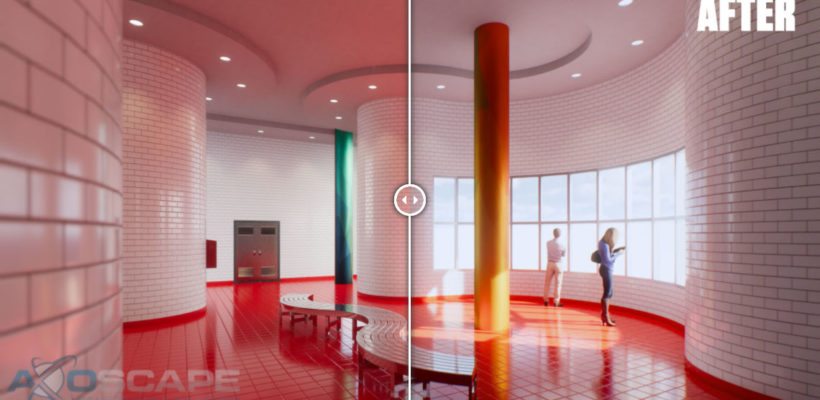
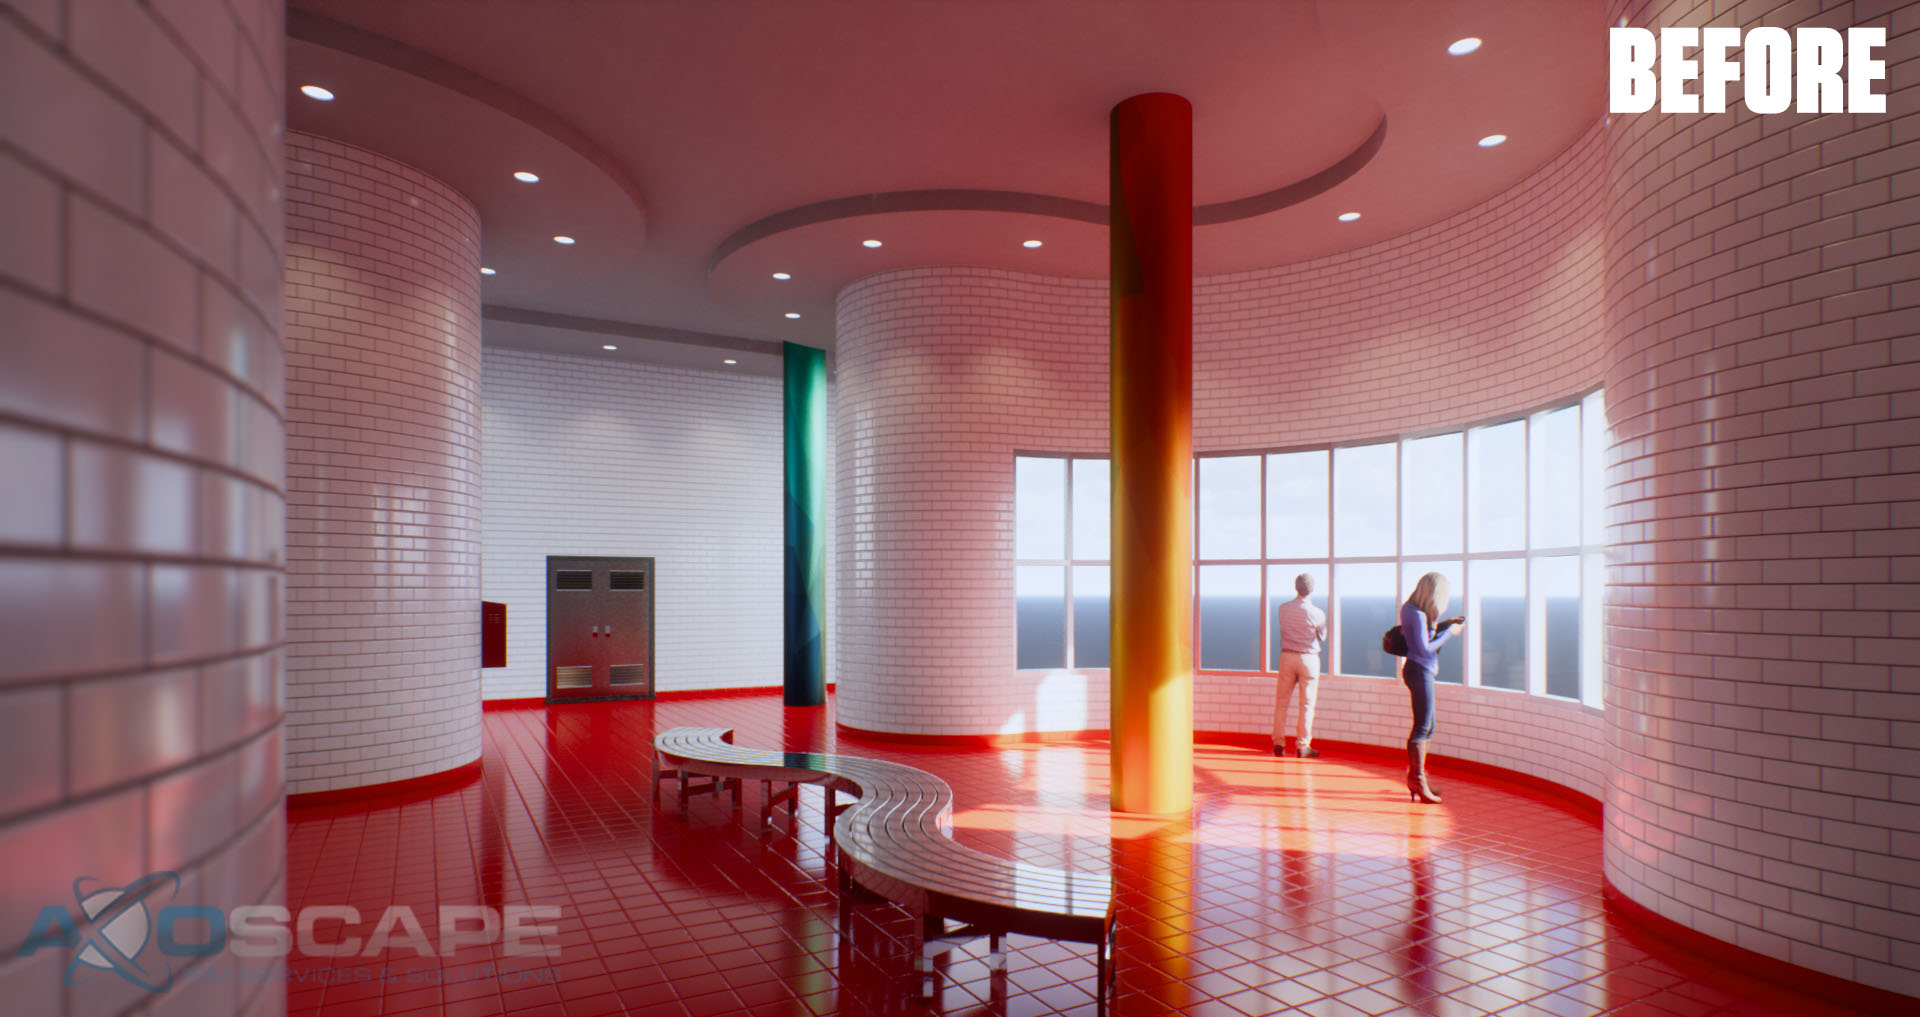
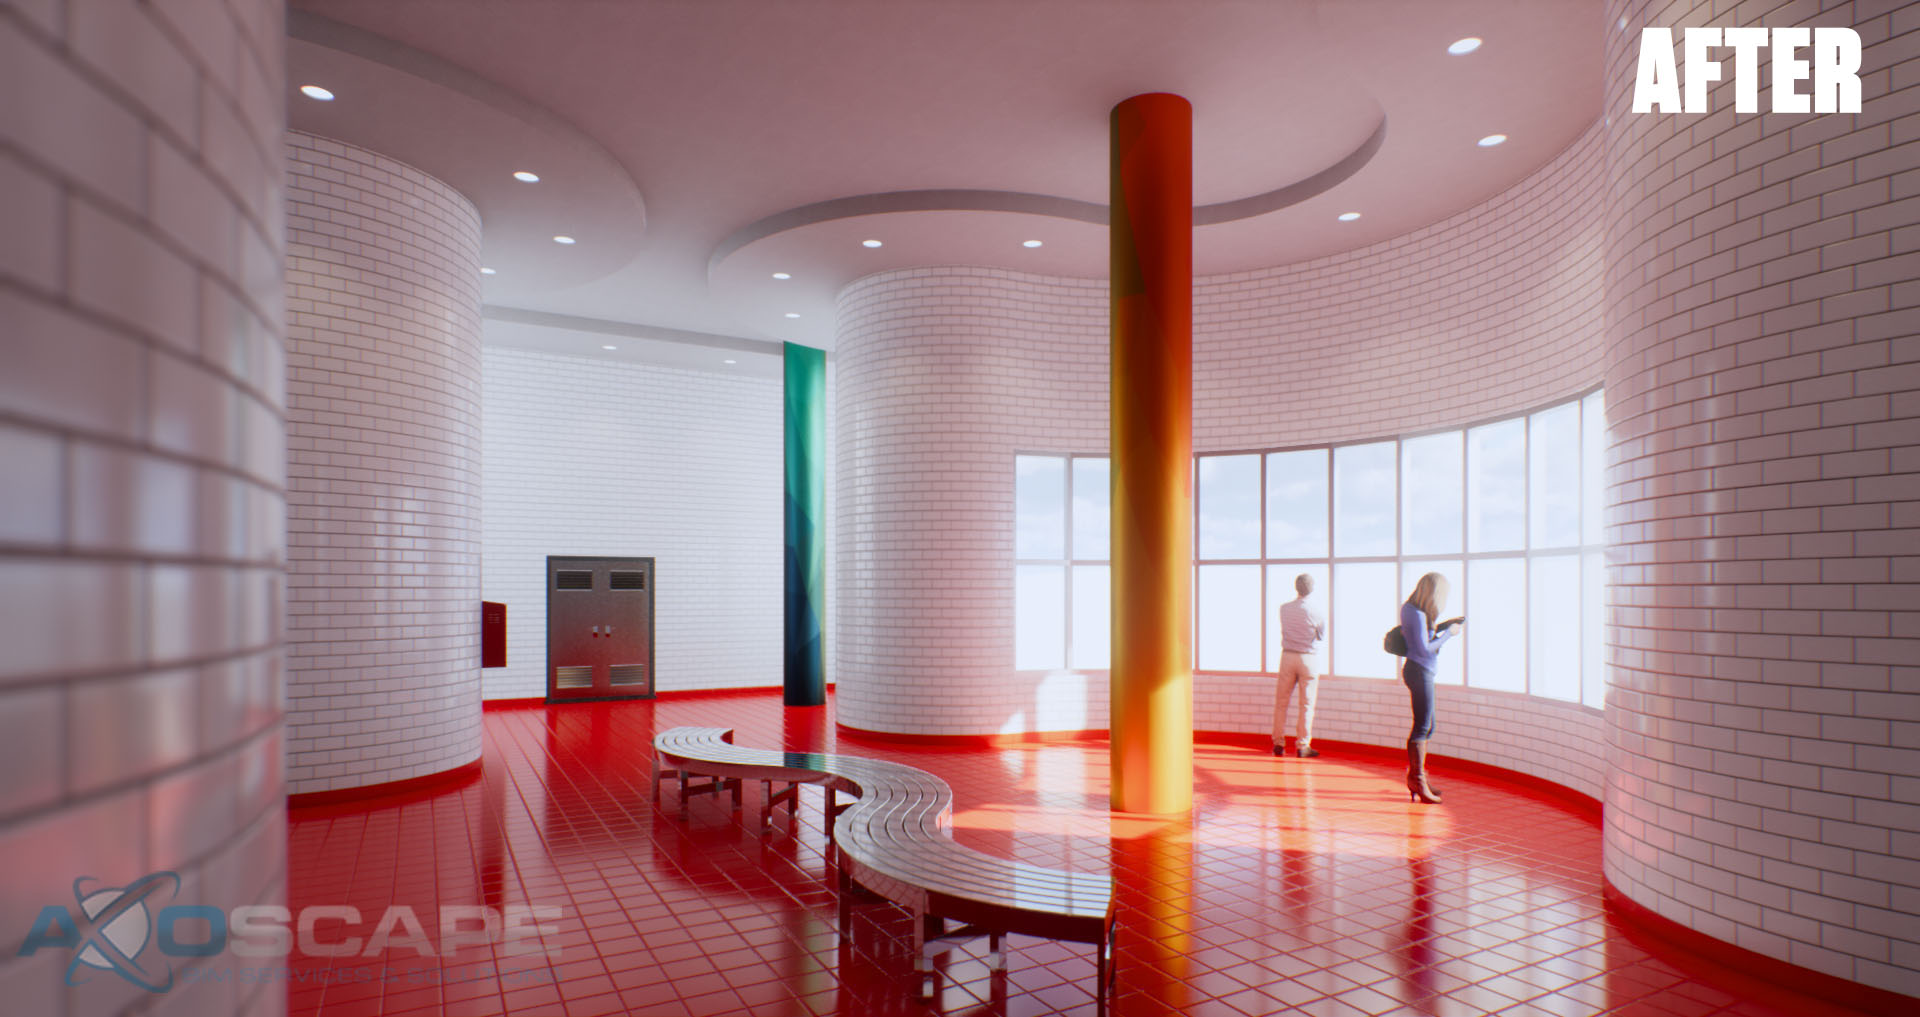
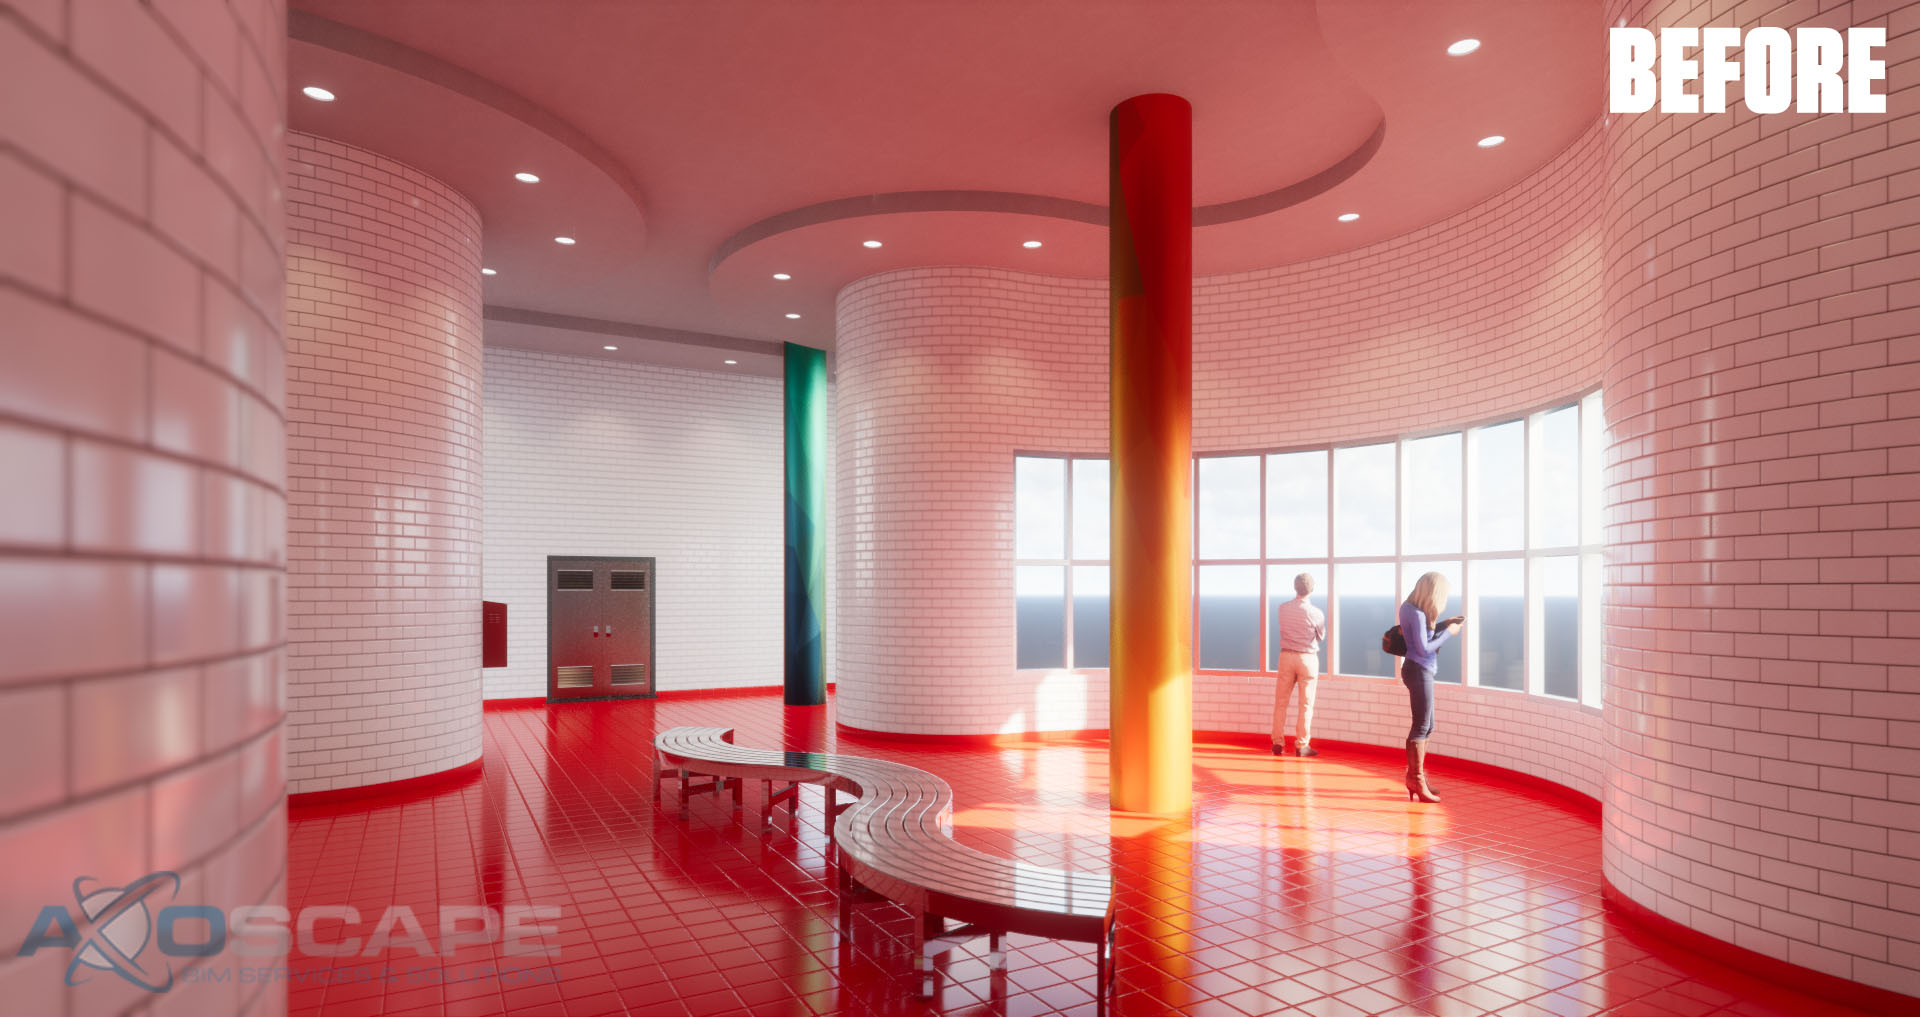
Physics-based lighting engines have been the defacto go-to for renderings in recent times because of their jaw-dropping results and ease of use. Enscape is one of these amazing engines and is quickly becoming the visualization plugin of choice for Revit due to the real-time feedback interchange between Revit and Enscape. One of the hurdles of dealing with any physics-based lighting engine is the issue of color bleeding. This can happen with scenes where a strong primary color, such as red/blue/green, bleeds onto neutral color surfaces resulting in unwanted color bleed. This article will go over ways to overcome this issue using only Enscape setting sliders.

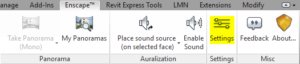
To open the setting sliders, click on the settings button under the Enscape tab.
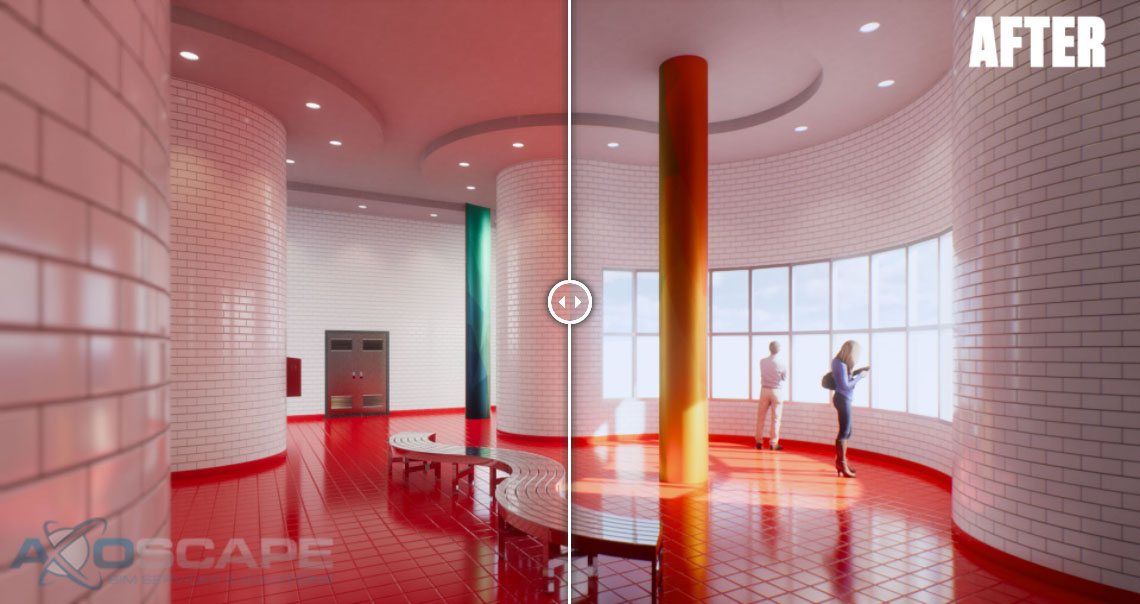
The general tab should present itself when opening settings. Below is a side by side comparison between the settings for the before/after images. 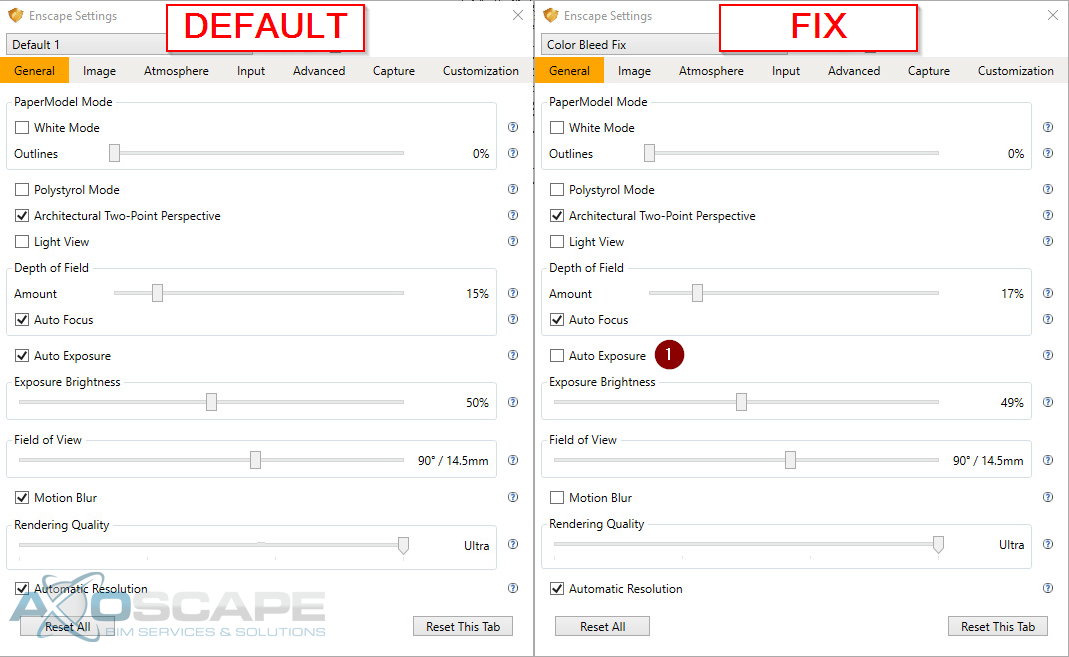
Uncheck Auto Exposure
By default, Enscape will try to adjust the light exposure of the scene based on dark/light levels. Because of the settings being made later in the article will affect this automation, it is best to uncheck and manually adjust as needed.
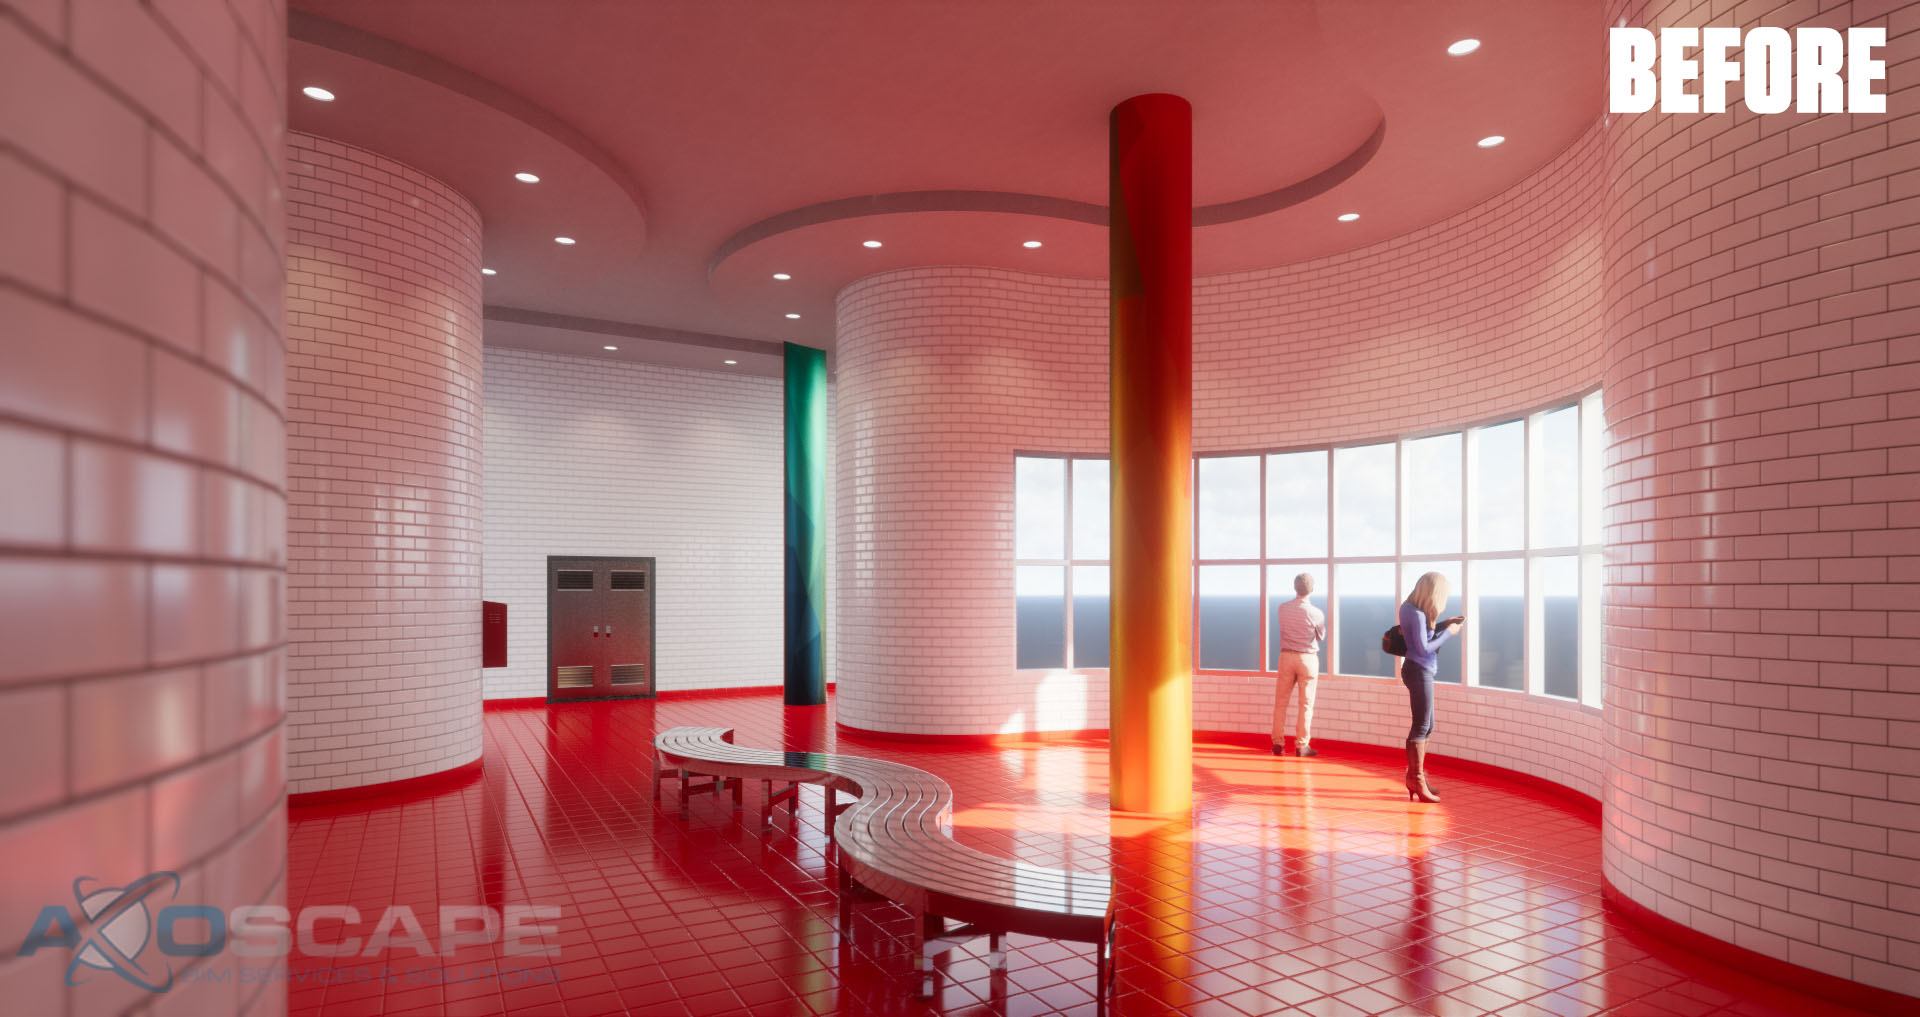
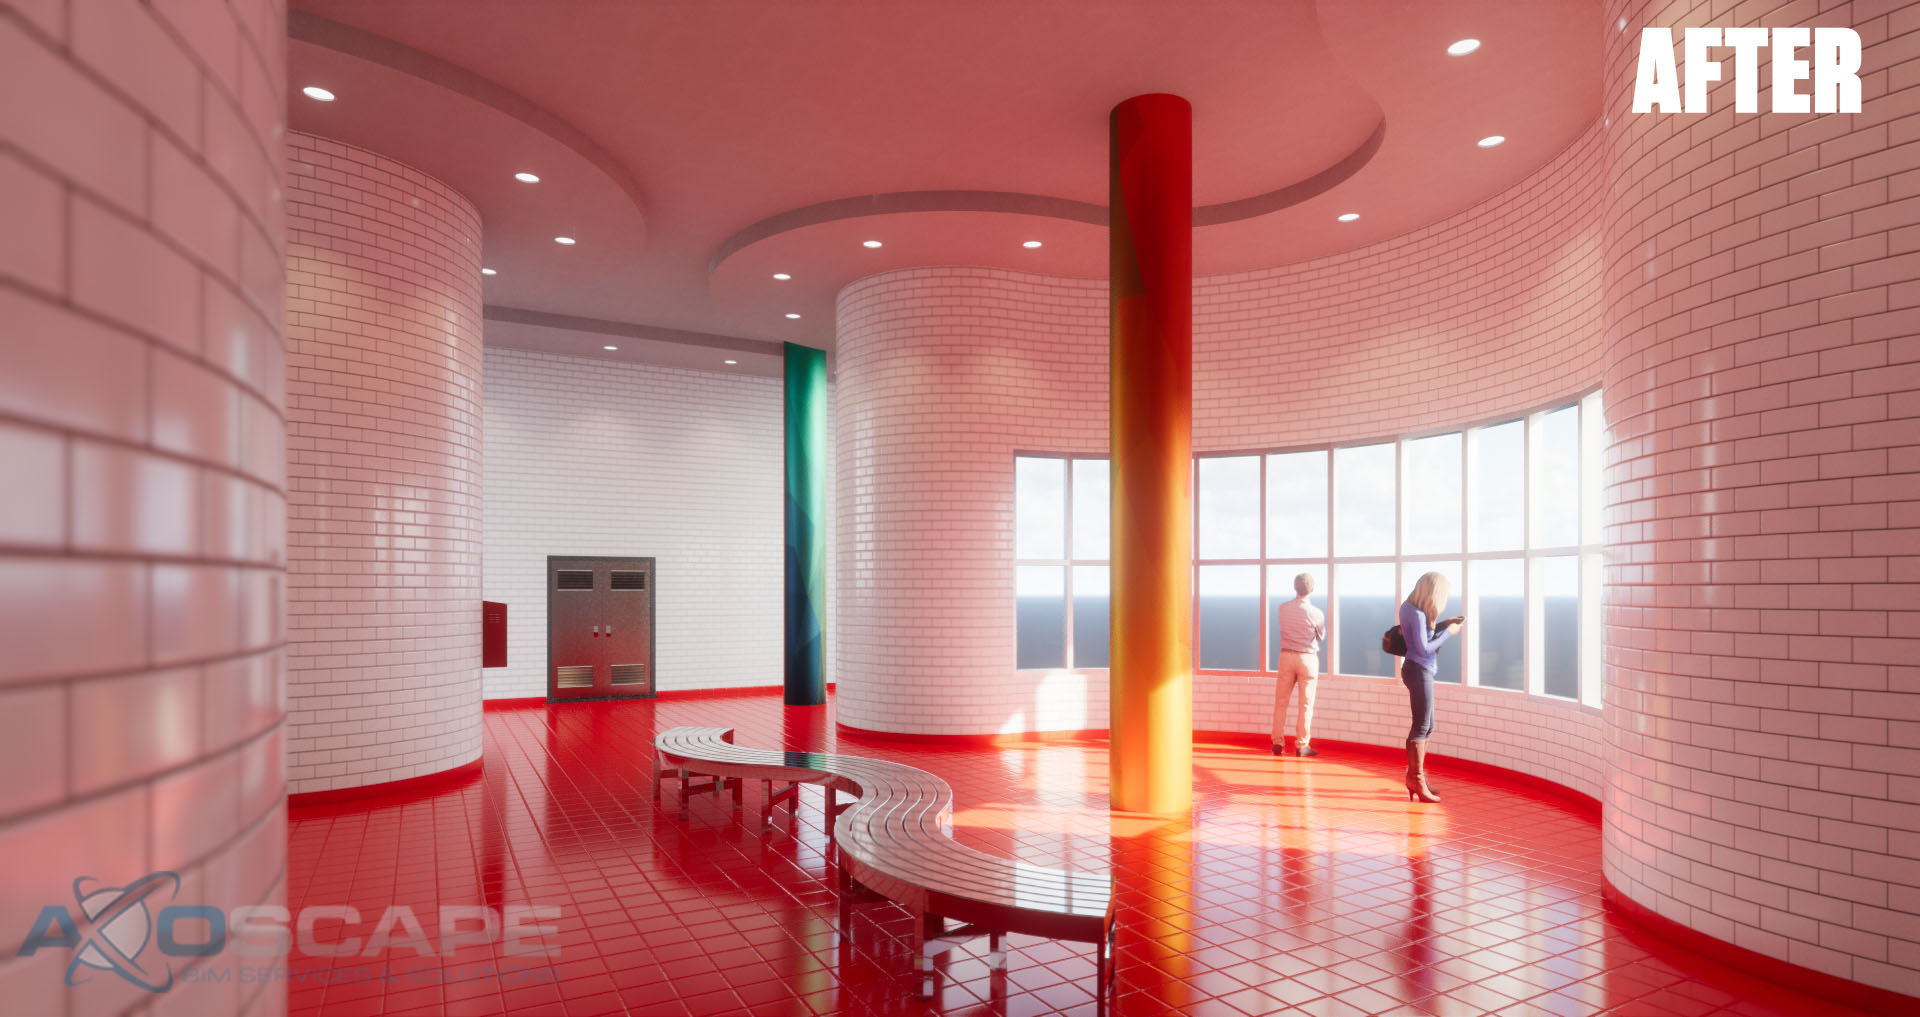
Image settings contain the most important tweaks when dealing with lighting, color, and effects.
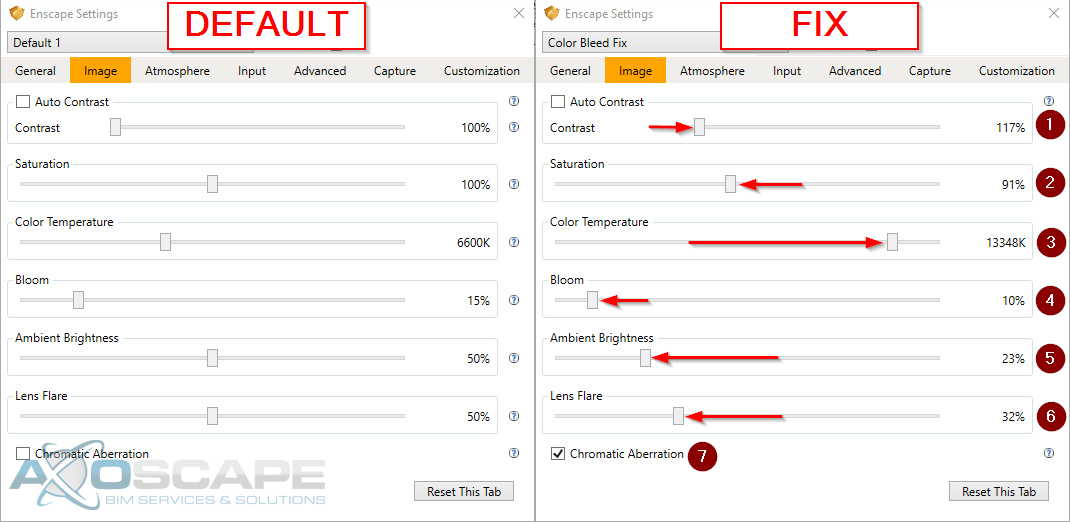

- Raise Contrast
This setting should boost the color output which is important to do because lowering the saturation will drown out the colors. - Lowering Saturation
This will help remove some of the color bleedings from walls and ceilings but will need contrast to help bring back color to elements that fade. - Raise Color Temperature
Color temperature will either make the scene (lower) warmer or (higher) cooler. In this case, the color red is bleeding, by moving the slider to the right it helps negate the red color by balancing out the image with cooler (blue). - Lower Bloom
This setting does not impact color bleeding but due to the changes to the default lighting settings. This may be adjusted so bloom doesn’t overpower the scene and make the lit areas too fuzzy. - Lower Ambient Brightness
Ambient brightness helps provide a scene with additional lighting when the natural or artificial light is lacking. Normally this is a great way to increase lighting but because of the color bleeding issue increasing this setting will exacerbate the red color being bounced by the lighting engine. Lowering this slider will help prevent color bounces and reducing color bleed overall. - Reduce Lens Flare
Similar to the bloom setting, adjusting the lighting settings will have an effect on lens flare. In this scene reducing lens flare helped with the scene but it may vary depending. - Chromatic Aberration
This setting doesn’t affect color bleeding, but it does improve the believability of the scene.

The atmosphere tab allows the scene to adopt lighting based on an external scene.
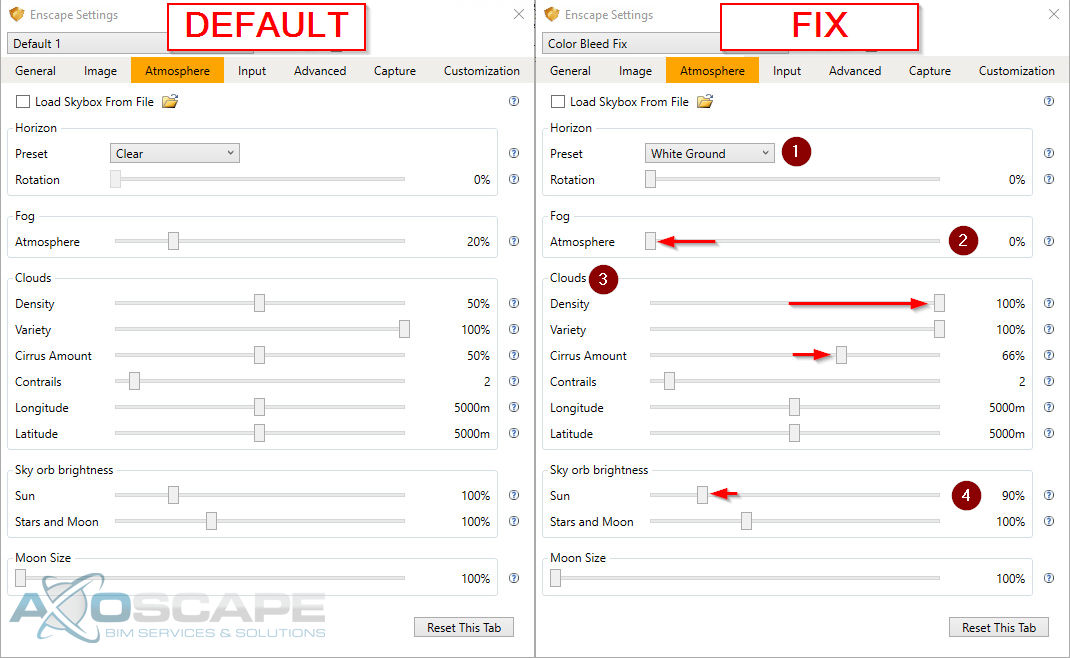

- Horizon Preset
This setting has an incredible effect on the color bleeding issue. By simply switching from “Clear” to “White Ground” the scene is provided with more neutral natural light to be bounced into interiors and reduces the color bouncing by a huge margin. This setting may be the most important setting to negate color bleeding. - Reducing Fog
This has no bearing on color bleeding but helps with being able to see the cloud because of the lighting settings. - Clouds
Again, no bearing on color bleeding, but do adjust so clouds are visible in windows, etc… - Sun orb brightness
The sun setting controls how intense the sunlight source is, reducing/increasing the slider will depend on your scene’s needs. For the article’s example, reducing sun intensity decreased the overall brightness and prevents the image from being washed out with too much brightness.
Hopefully going over these settings will provide a deeper understanding of how they impact scenes and what to do to handle future color bleeding.
Download the Revit (2016) Scene & Materials and follow along with the article.
Enscape 2.1 required